

19 Feb Photographing Queen Caroline’s Temple in Hyde Park, London
What is it?
Queen Caroline’s Temple is a classical style summer house overlooking the Long Water, east of Lancaster Walk in Hyde Park, London. When I saw it at sunset I envisaged a beautiful temple with all the detail of the brick work against a blue winter sky. You can see this is not what the original Raw file shows.


Drag the line in the middle to see the before and after image.
Let us see what we can do to fix it.
The Image that I originally created appears to be under exposed. It’s not that this was an error on my part. I deliberately chose this exposure so I could get some detail in the bright area of the sky as I knew I could pull back detail from the shadows. It’s so much harder to get detail from the highlights as once its gone it’s gone. For those used to shooting film it’s like using transparency – shoot for the shadow.
As you can see from the image sequence below I open the image in the raw file converter (similar setting can be done in Lightroom). Why do I use Bridge and not Lightroom? Well I do a lot of work in Adobe Illustrator and Indesign as well as AfterEffects and Bridge works with all these formats. I will do a separate post about the pros/cons of each bit of software.

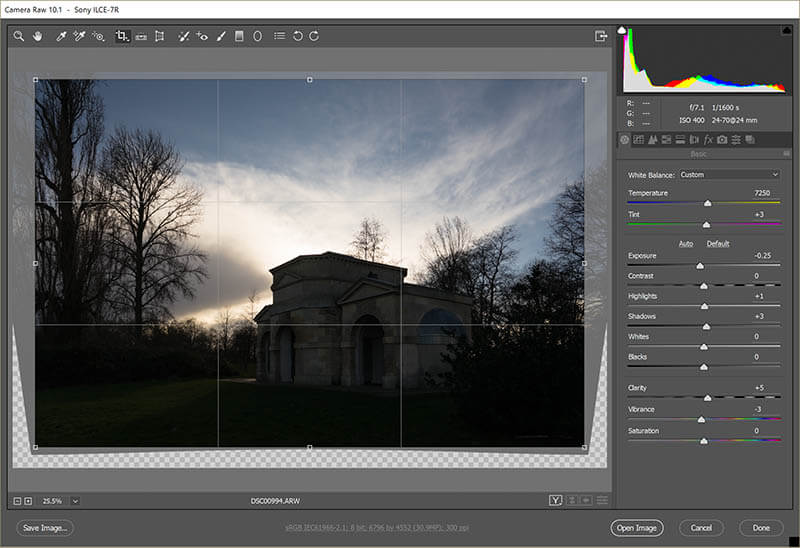
Original image in raw direct from camera
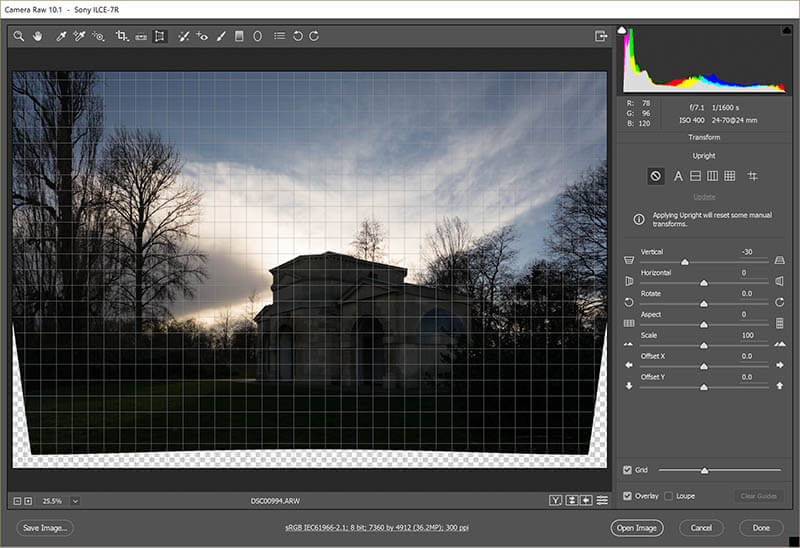
Straighten Image verticals
My first area to work on is to fix verticals, horizontals and perspective. I then crop the image to the correct ratio.
Crop image
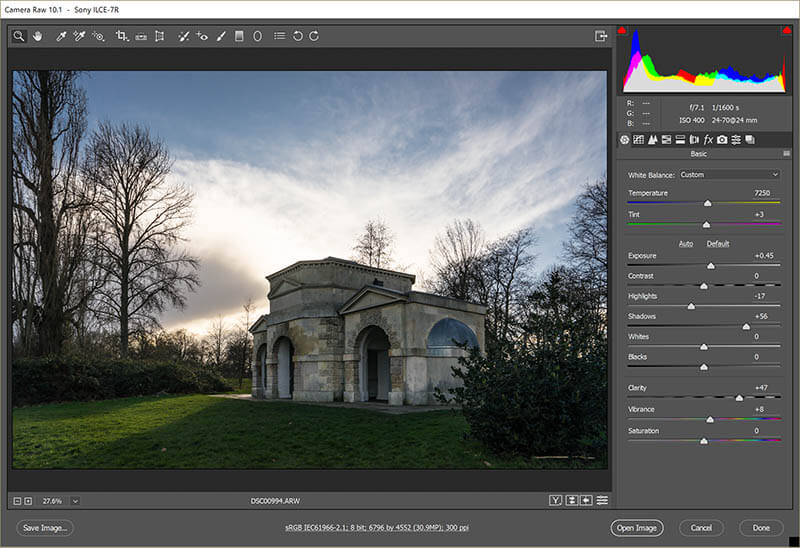
Set up basic lightness and colour balance
Next is to sort out the lightness and darkness of the entire image. I use exposure and shadow and highlights sliders for this. Next comes contrast. I do use curves (not pictured here. I will do an entire post on using curves soon.)but also a lot of micro-contrast called clarity. Next comes colour correction. This needs to be done after sorting out your lightness/darkness as its easiest to correct colour on a well exposed image. I add vibrancy and saturation after this if it needs it.
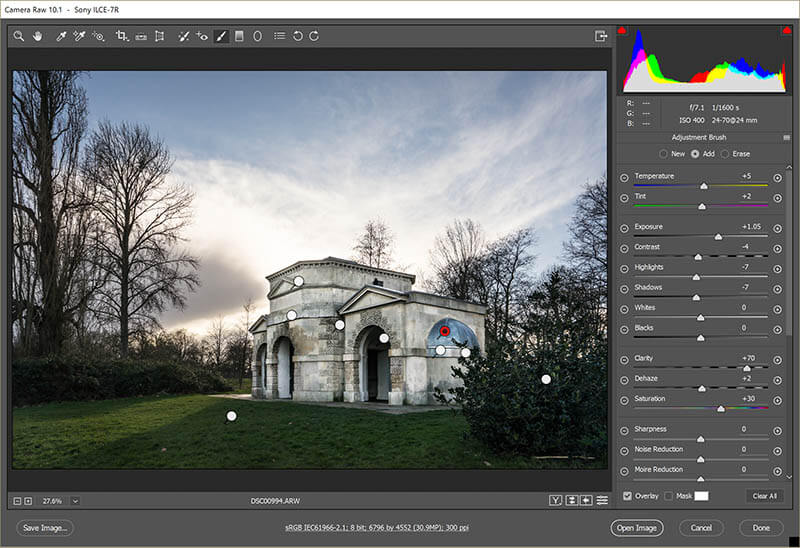
Use adjustment brush to augment areas
I then go into the adjustment brushes and adjust any areas I think need it. For you traditional film photographers this is like your dodging andd burning stage but with so many more options. You can see how I brought back detail in the building and increased the saturation and contrast in these ares. I did saturation/vibrance and contrast/clarity as these are usually lost in the darker areas of an image.
I finally keep this as raw file so I can always edit it later.
No Comments