

26 Apr Tombs of the Kings – Cyprus – Before and After Image
Tombs of the kings before and after
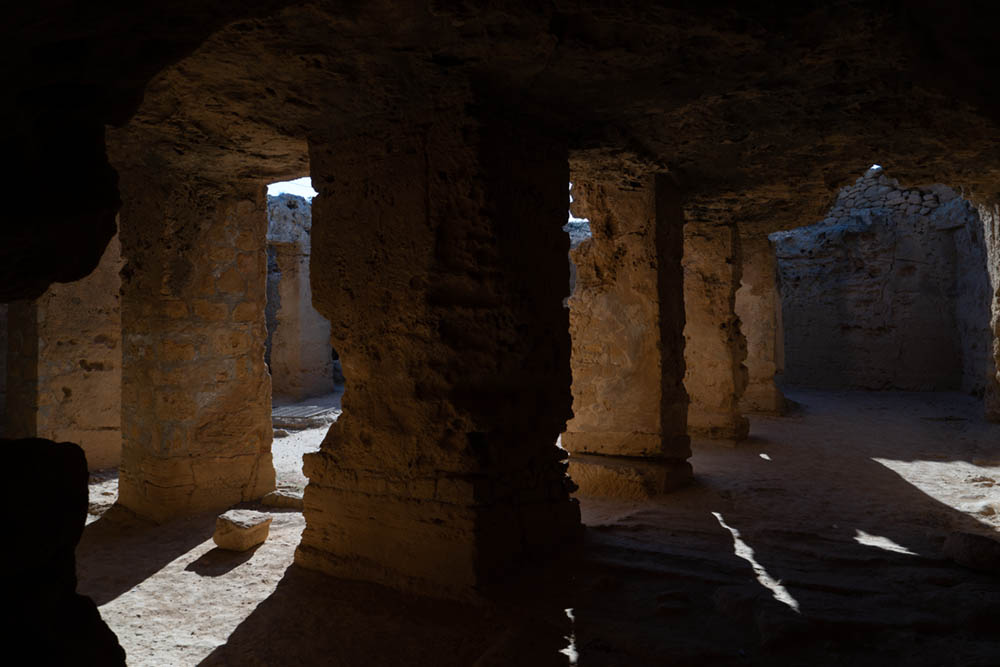
The Tombs of the kings before and after image is of a UNESCO World Heritage Site about 2 km from Paphos Harbour. Many of the tombs date back to the 4th century BC. It has nothing to do with kings! The name comes purely from the magnificence of the tombs. There are a lot of ruins obviously, some more interesting than others. But if you go down underneath some of them there are some amazing images to be made. One in particular, with lots of pillars, with the golden light coming through was beautiful. We visited the site late in the day so the light was streaming in at an angle.


Drag the centre line to see the difference
The problem image
The problem with the scene is that I wanted a bit of detail in the bright sunlit areas as well as in the darker bits. Most cameras have a range of light that the sensors can record. This is known as the camera’s dynamic range. Using Raw you can access a greater range of light, than photographing as a jpg will give you. I exposed my image so I definitely had a bit of detail in the highlights and then ‘pulled back’ the details from the shadows in Adobe camera Raw. I used a manual setting on the camera so as not to overexpose the highlights as the camera can lie to you about exposure.
To create more atmosphere, we kicked up some of the dust so it was hanging in the air. Unfortunately this didn’t give us the ‘correct’ looking light streaming through the haze so we added it in later in Photoshop.
Let me show you the steps we took with this Tombs of the Kings before and after tutorial. It is done in Adobe Camera Raw and Photoshop but could easily have been done in Affinity Photo. Click the link to see our favourite Photoshop Shortcuts.
Into Camera Raw
Original out of camera image before adjustments
So straight into Adobe Camera Raw. (Quick tip: Instead of double clicking an image to open it in Raw try right-clicking it. This allows you to choose to open it in the Raw file converter without waiting or Photoshop to open first.)
Setting the base adjustment
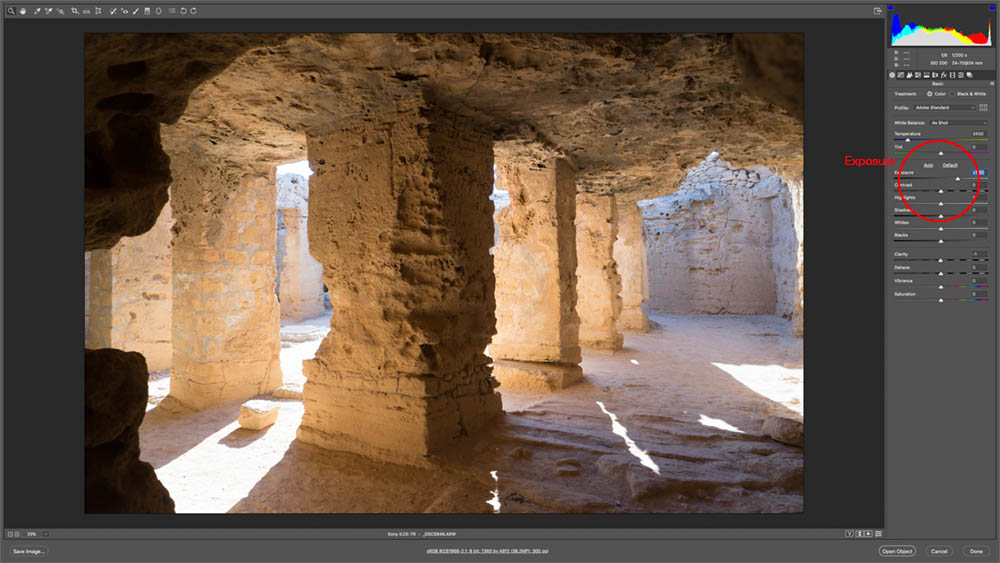
Adjusting the exposure is not the way to get effective results
If you just adjust the exposure you will find that the highlights also get lighter. This is similar to what would happen if your camera was set to auto and the camera would try to lighten the large dark area.
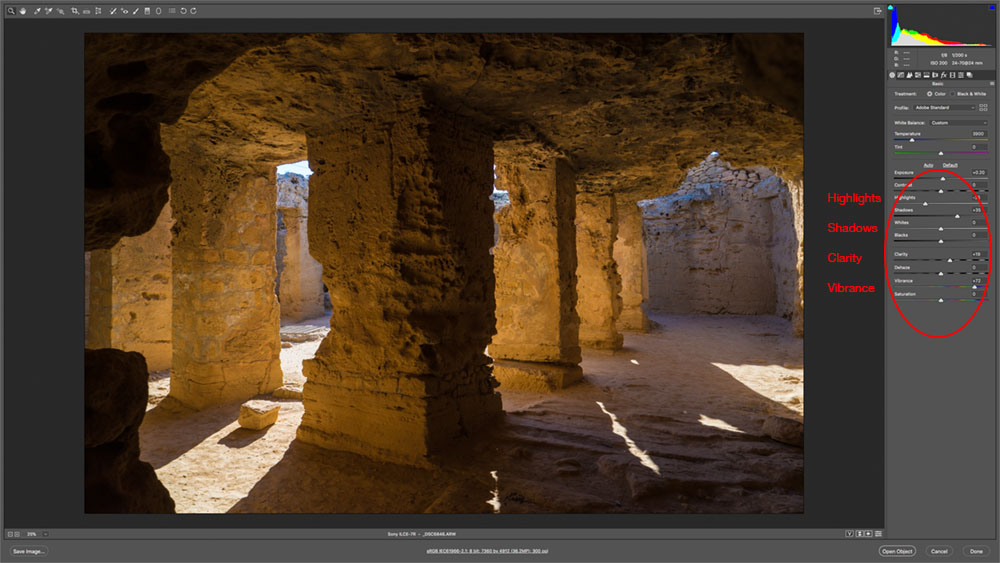
Use the Highlights, Shadow, Clarity and Vibrancy sliders to set a base exposure
Instead of adjusting the exposure a lot, I pulled the Highlights slider down to darken the lighter areas, the Shadows slider up to lighten the darker areas, and the Clarity slider up to to get as much texture in the rock as possible. Finally I added lots of vibrance to bring out the colour of the rock.
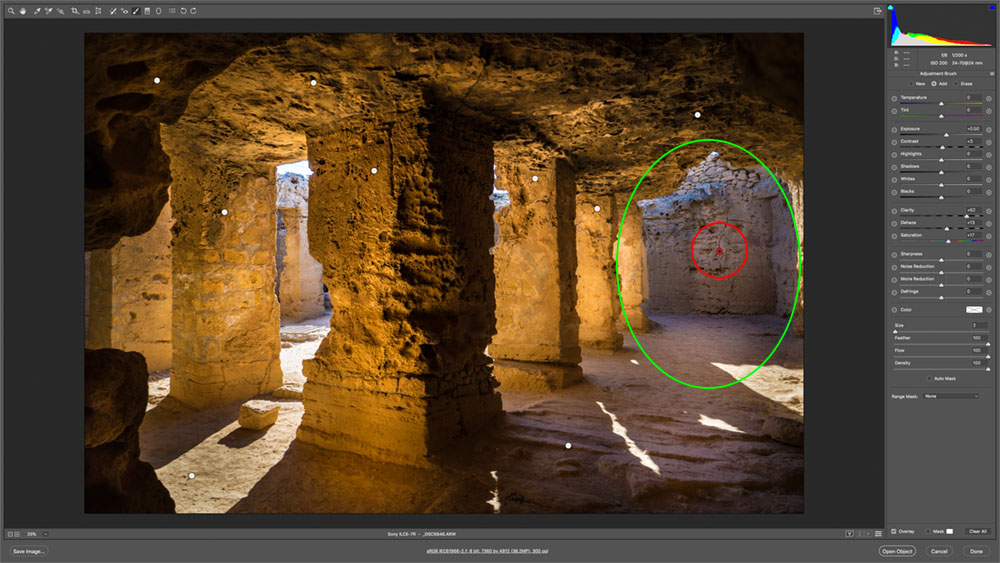
Selective lightening with the adjustment brushes
Go to the adjustment brushes tab along the top of the screen (it’s a brush icon) and paint an area you wish to adjust. I painted a large area (where I put the green circle) and then changed the settings on the right until I liked what I saw. All the white dots you see are where I added a new brush adjustment. The red dot in the red circle is the active brush.
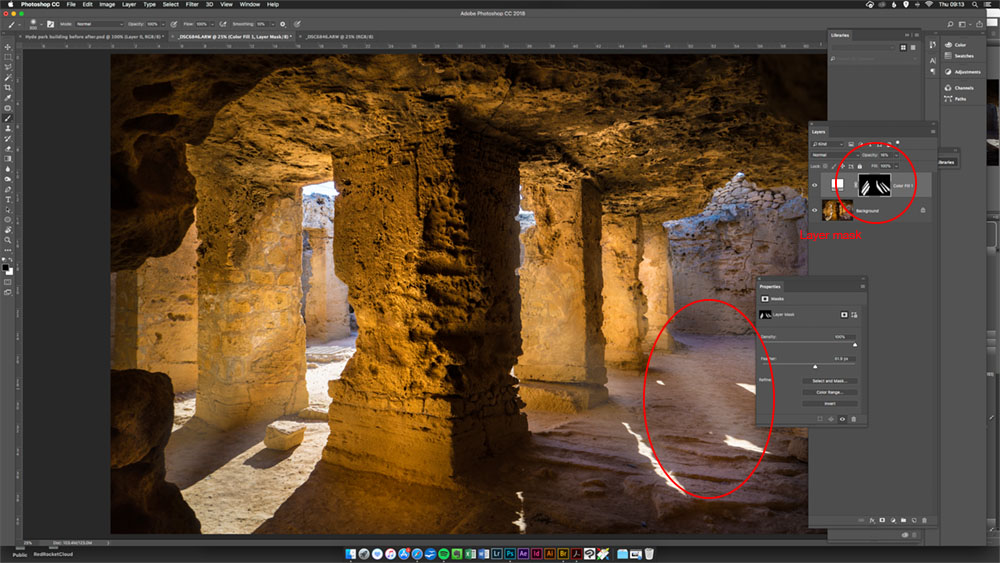
Adding your own lighting
I was still not happy with the light rays, so I decided to create my own. I will be dedicating a full tutorial to this technique but basically I made a selection where I wanted the rays to be, added a solid white adjustment layer and then feathered the mask. Finally I reduced the opacity of my new ‘ray’ so it’s barely visible.
Final Image
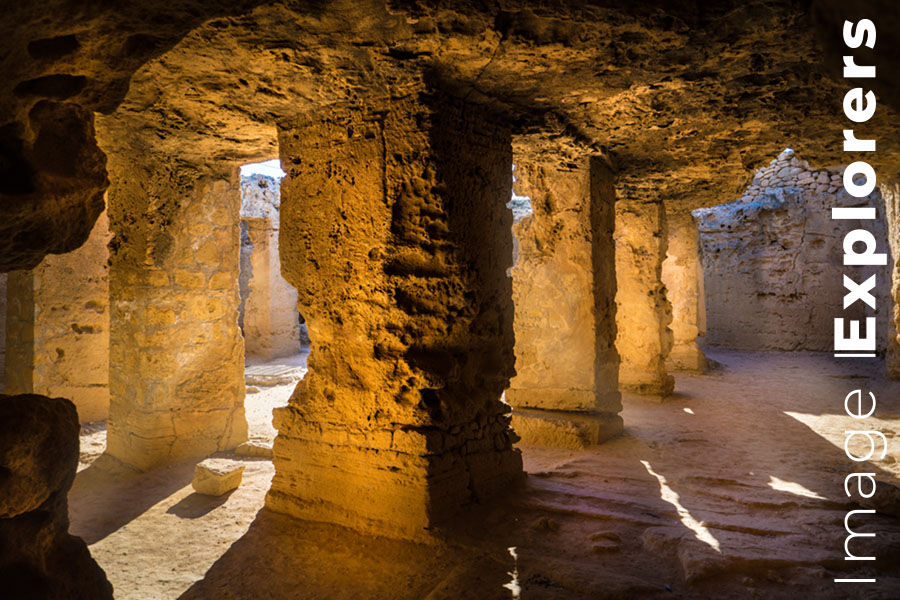
Tombs of the Kings in Cyprus
So to sum up the edit of the Tombs of the Kings Before and After image.
- Photograph in manual
- Do your initial Raw edit with the whole image in mind
- Use adjustment brushes to ‘dodge’ and ‘burn’ areas until the image you envisaged appears.
- Possibly add extra lighting you were unable to capture in camera.
I was really happy with the final result as it was just how I had envisaged the final photograph.
The big question is! Is this a “cheating” image, as I added in the rays that were not visible? Well… I think that it reflects what I saw when I stood there but you might think differently.
No Comments