

03 May Vatican Museum staircase photography – multiple image edit
Vatican Museum staircase photography – multiple image edit
The problem with the Vatican Museum Staircase photography is people. From opening time until closure during the summer, there is a constant stream of tourists descending this beautiful architectural masterpiece. A plethora of photographers at the top are also trying to get the same image. So what do you do?


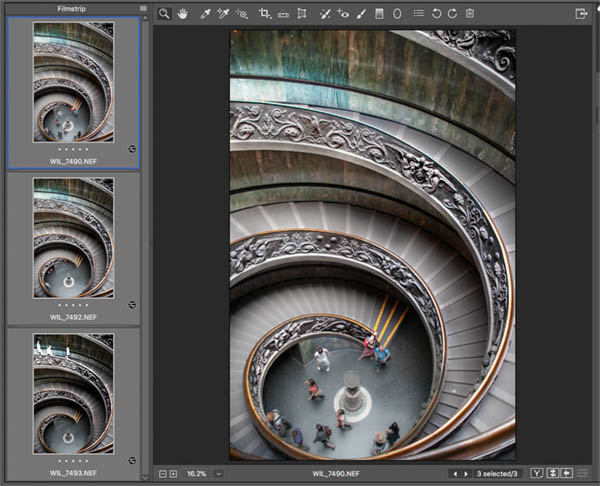
Drag the centre slider to see Before and After.
Initial thoughts and photography
My initial thoughts when photographing the stairs was to have an empty graphical spiral however this has been done so many times I felt I would have just another tourist photograph. Still, I went ahead and made the images. I created several images from the same viewpoint as I knew I could ‘clone’ people out from one image onto the other. I hand held the camera – took a photograph and then waited until people moved before taking more. This I did a few times until I was sure I had all the staircase areas without people.
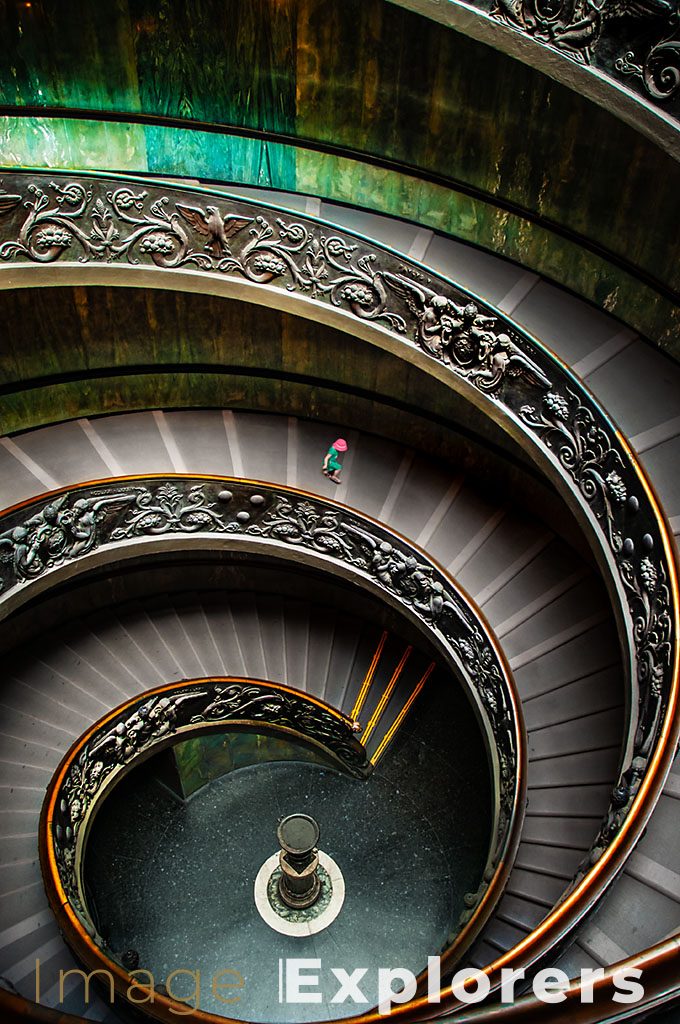
Whilst assessing the images on the computer later, I got a really, pleasant surprise. On one of the landscape format images, was a small child on her own with brightly coloured clothing that complemented the staircase so well. I hadn’t noticed her while watching the crowds on the stairs. I had to include her as I felt this would just lift my image away from the usual ones.
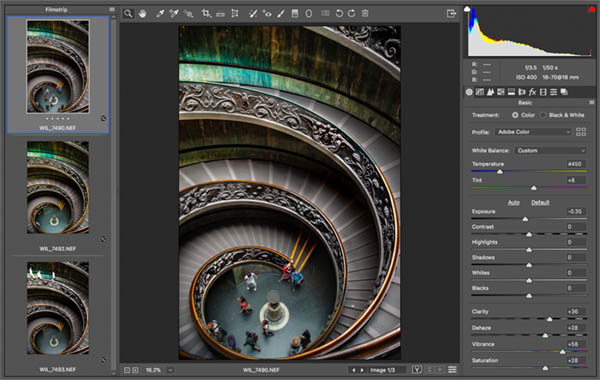
Doing the basic Raw
The first thing was to get all the images to be used into Raw. Once in you adjust the basic settings so the exposure, contrast and colour looked as I envisaged it, and all the images matched.
Before edit in Raw
After edit in Raw
There was a very strong light to one side. To fix this I used an adjustment gradient and changed the exposure until the area matched the rest of the image.
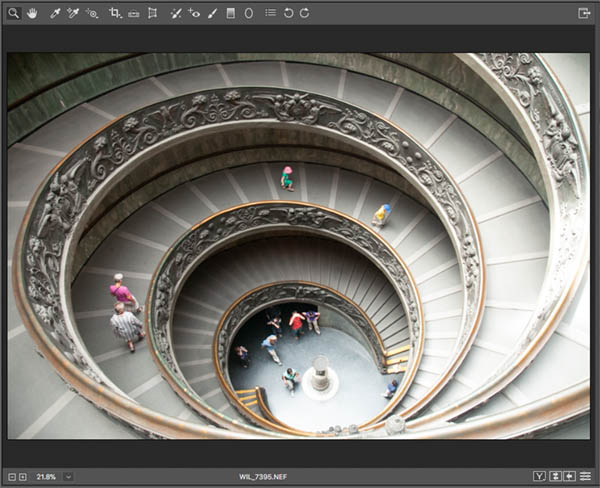
Here is the uneven lighting that needs work
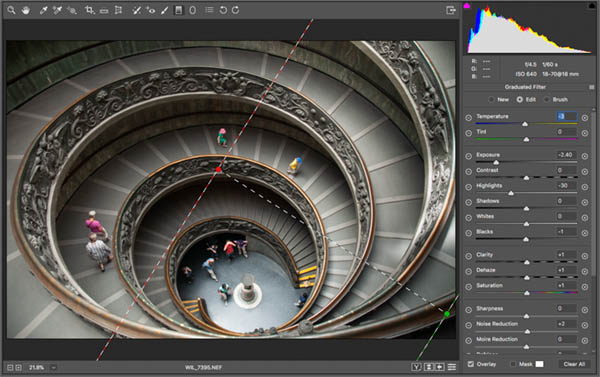
Use the Adjustment gradient in Raw to even out the lighting
I went into the main image and adjusted the various areas with the adjustment brush to bring out more details in the shadow areas, and increase contrast and vibrancy on the ironwork. There is no magic-method that I use here. I just adjust areas as I feel, until it looks like I want it to look.
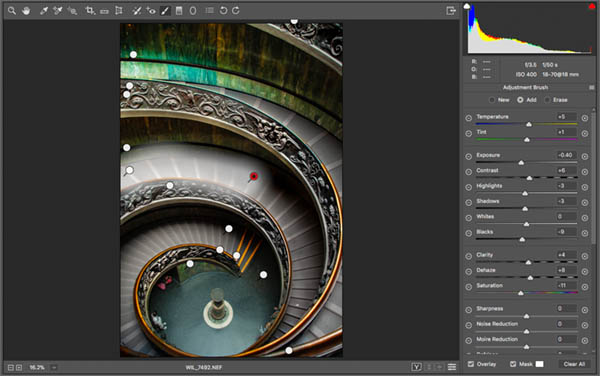
Use adjustment brushes to lighten or darken various areas to taste
Into Photoshop for some copy and paste
Once the Raw work is done I opened all the images in Photoshop and copied the staircase areas from the donor images and pasted them to cover the tourists. I usually copy more than I need and add a layer mask to hide the excess.
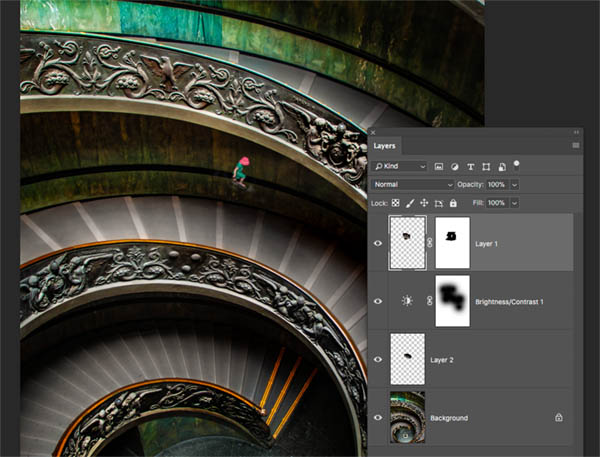
You can see the girl on a separate layer with a layer mask
I then copied the girl from the landscape image and matched up the stairs. No easy feat as they were taken from different angles.
- A quick tip: When you are trying to transform layers to match others, set the mode of the top layer to difference. When the 2 layers are exactly aligned they will turn black.
Is it real?
I am so very pleased with the final image as it was slightly different to all the other images of the Vatican Museum Staircase that I have seen. Even though it was a composite image I don’t feel as though I have cheated, as photographing a tourist attraction during opening hours can be a nightmare. However, I am aware that many people will not see this as a real photograph.
At the end of the day you need to decide. Who am I photographing for? In my case all of this Vatican Museum staircase photography is for myself and so as long as I’m happy with it, that’s all that matters.
Do it for yourself and forget what everyone else thinks!!
No Comments