

04 Jun Convert Colour to Black and White – Tips and Geeky Explanations
Convert Colour to Black and White
Why would you wish to convert colour to black and white? After all, we all see in colour. There are so many reasons. Maybe the original image has too many clashing colours? It could be that the weird mix of colour balance (eg, a mix of outdoor light with some indoor lighting) in the image is just too time consuming to correct. Or perhaps you want to replicate old film. There are so many other reasons. But, I usually want to convert colour to black and white because it is just so very beautiful and striking.
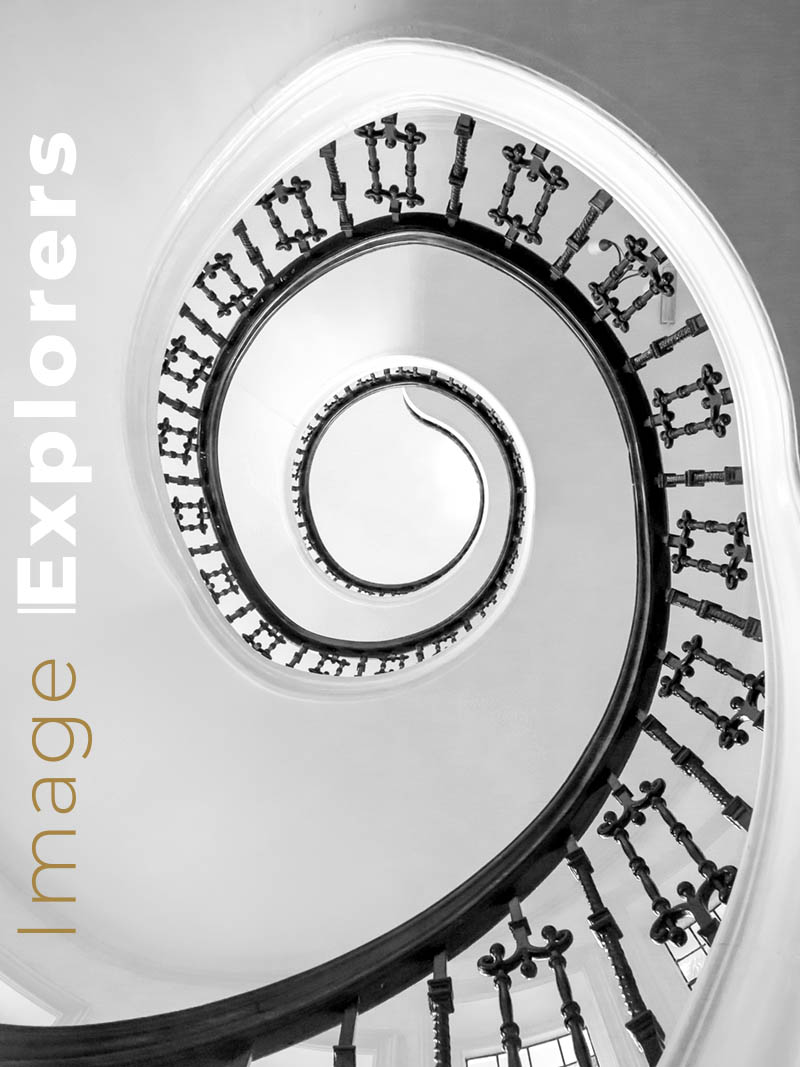
This staircase that Ally photographed at our AirBnB in Bournemouth looks so much more graphical in black and white.
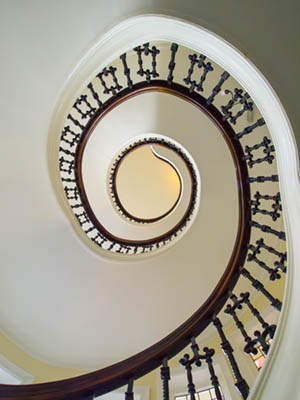
Here is the original colour version before converting to black and white
Surely you just choose a menu command and it’s done?
Well yes, you can do that but you would be missing out on the joy of controlling the converting of colour to black and white and seeing your image come alive. Most of the quick fix conversions just remove the colour from your image. This, more often than not, leaves a flat dull photograph that requires a lot of dodging and burning or contrast correction to give it more ‘pop’.
The technical explanation that you don’t really need unless you’re a geek or sitting in a coffee shop waiting for a friend!
All colours, whether in the real world or in an image have 3 main values.
- The actual colour value (Hue)
- The amount of saturation that colour has (Saturation)
- And finally, how light or dark that colour is (Luminance / Lightness).
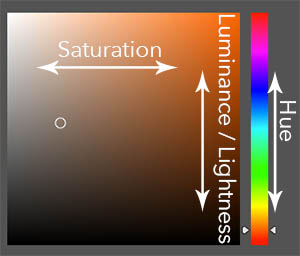
Colour Picker
This can be easily seen in a lot of colour pickers. It is usually referred to as HSL in software adjustments.
Hue, Saturation and Luminance (or Lightness)
So, to convert from colour to black and white, what we want to do is to remove the colour. But we also need to be able to adjust the lightness values of the separate colours individually. This is so we can maybe brighten up that beautiful red sunset cloud whilst at the same time darkening down the blue sky.
But this black and white voodoo never happened in traditional photography I hear you say
Ah, but it did. Here is some more geeky stuff to explain it. Traditional film (silver halide) is sensitive to light. So photographers used varying colour filters to lighten or darken parts of the image they were exposing. One of the most common filters was an orange filter. This absorbed blue light so when the image was exposed, less light from the blue areas got to the film, resulting in a darker blue. This was usually used on landscapes to make the sky go dark and dramatic whilst keeping the clouds white.
One of the greatest traditional landscape photographers, Ansel Adams, used yellow, orange and red filters on his camera to achieve the spectacular images of Yosemite and some of his skies are almost black in the print.
A different technique with film is to use a polarizing filter to darken down the sky.
We are doing the same thing, but with digital we can lighten or darken any colour in the image during conversion.
How the magic is done
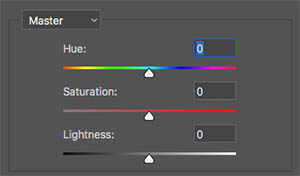
In Photoshop or Affinity Photo go to your layers panel and at the bottom find the adjustment layers button. Add a black and white adjustment layer – in here you can lighten and darken the various colours to achieve a spectacular black and white image.
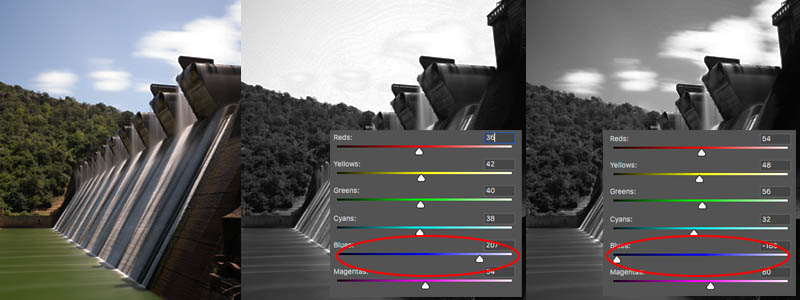
Using black and white to lighten and darken when you convert colour to black and white
Some tips to achieving black and white Zen
Quick tip 1: Try to pre-visualise your black and white image at the creating stage. Many mirrorless cameras let you change your display settings so the display presents in black and white. I use this technique a lot on my Sony A7R. This way, I concentrate more on the shapes and composition as well as the lightness values of the image. This helps stop me getting distracted by the colours. The great thing here is that the camera still records the full colour image, so I can have my cake and eat it!
Quick tip 2: If your camera doesn’t support this function you can take a coloured filter with you. View the scene through the filter to help get rid of distracting colours and enable you to concentrate on the lightness values and shape. Remember to take the filter off the camera before you take the photograph though. Also remember the filter might affect the way you see the values: such as a red filter will make the reds lighter and the blues darker. See our post on essential filters for black and white photography.
Quick tip 3: Geeky stuff alert! If you convert colour to black and white in the Raw file converter, be aware that the default file that opens in Adobe Photoshop will be a single 8-bit channel greyscale file. 8-bit channel images are made up of 256 levels of lightness per channel, from black to white. Therefore, a greyscale image only has 256 shades of grey. An 8-bit RGB image has 3 channels, each with 256 shades. This could mean you get banding in the beautiful graduated sky areas. (I will cover this in detail in a separate post soon.) More importantly, unless you convert the image back to RGB colour, you won’t be able to add colour in Photoshop, even in the form of text. You can do this by going to the Image menu > Modes > RGB colour.
In Summary …
Finally just remember… A boring photograph is still a boring photograph even if it’s converted to black and white. But a good photograph can sometimes become even more stunning once you convert it to black and white.
Robert Dow
Posted at 10:17h, 08 JuneGood tutorial
Tim & Ally Wilson
Posted at 11:09h, 11 JuneMany thanks Robert. We’ll keep going with more.
0546 numara
Posted at 15:03h, 15 JuneExcellent blog post. I definitely love this website.
Keep writing!
Ally &Tim Wilson
Posted at 11:19h, 25 JuneThank you! We will. 🙂