

13 Nov How to photograph like Ansel Adams
How to photograph like Ansel Adams
I, Tim, have 2 favourite photographers. I could sit and contemplate their work for hours on end. Both these photographers are landscape master craftsmen and artists of the highest order and their images bring me untold joy. One of these photographic genius’ is Michael Kenna who is still creating beautiful, thought-provoking images from around the world. The other is Ansel Adams, a legendary landscape photographer famous for his spectacular images of Yosemite National Park in The United States. As part of how ‘How to photograph like…’ series that includes Michael Kenna and Edward Weston I’d like to show you how to photograph like Ansel Adams or at last get your digital colour images to look like his beautiful prints.


Drag the slider left and right to see before and after
A purist photographer?
Ansel Adams photographed mostly using black and white film and large format cameras. His beautiful landscapes were enhanced using yellow or orange filters to darken the sky and despite being seen as a photographer who never manipulated his images he was never shy about dodging and burning to create the image he wanted.
The Zone System
Ansel’s one overriding concern was to create beautiful prints that had a full range of tones and to do so he worked out the zone system with Fred Archer. This system works by measuring the contrast of a scene and processing the film accordingly. A lot of ‘pre-visualsation’ is used to determine dark and light areas of the image. The ‘zones’ are 11 tones ranging from black 0 through to white 11.
Describing the zone system in 2 sentences is like explaining string theory using a colouring book and crayons – can’t be done, so for a full and proper explanation go to the Zone system wiki page.
Here is how I created my version of the legendary 1941 Ansel Adams image ‘Moonrise, Hernandez, New Mexico‘
Ansel Adams’ Moonrise, Hernandez, appears to be fairly contrasty as it’s probably a late afternoon, sunset image.
Open in Raw and convert to Black and White
This is my original image taken in the Drakensberg, South Africa, near Champagne Castle which was taken early morning. We were staying at a beautiful place called Spionkop and this was a couple of minutes walk from there. For more information on exposure for the moon look at our moon tutorial.
Original colour photograph for Ansel Adams conversion
The first thing is to get your landscape image open in Raw. If you have a Raw file you can just go ahead and open it, If you have a jpeg image you will need to open it from bridge by right clicking and choosing Open in camera Raw.
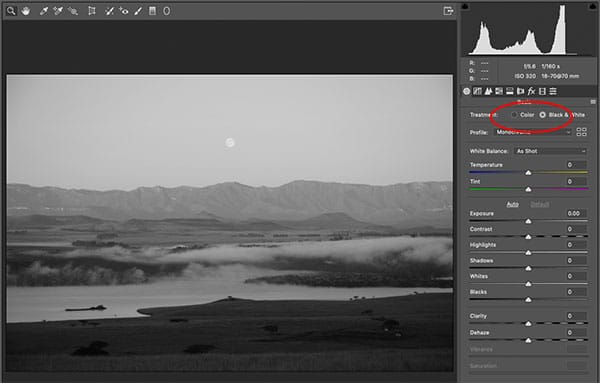
In Raw convert to Black & White.
Increase contrast
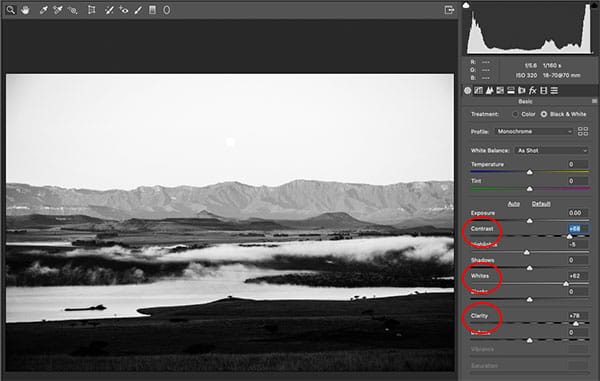
Push the Contrast, Whites and Clarity to the right. Experiment until you’re happy with the result.
Darken the sky
Using the Magic Wand make a selection of the sky.
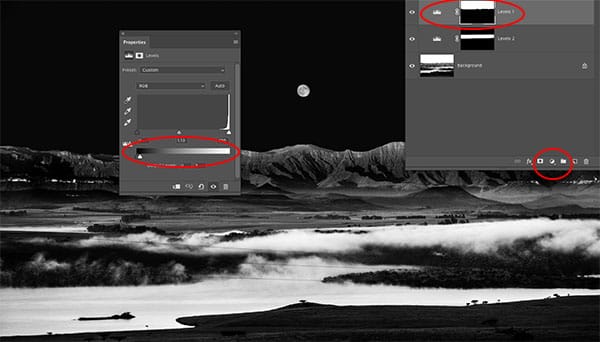
Then using Select and Mask (along the top), ensure that the Contrast is pushed a little to separate.

Now, darken the sky – I used Levels and pulled the bottom slider from the right to the left.
And voila! You can photograph like Ansel Adams too.
Final Ansel Adams style photograph
Have a look at our other ‘How to photograph like…’ series that includes Edward Weston and Michael Kenna to see how to create images like they have.
No Comments