

22 Oct Jurassic Coast Photography Editing
From Raw to finished image
In this post I will show you the photography editing steps I went through to turn a mundane image into something that brings me a lot of joy and is the image I pre-visualised.
Let me show you how it was done
When you are out photographing do you ever find yourself looking at the scene but visualising a result that doesn’t quite tally with what you see in front of your eyes. This was my experience when my son and I went photographing along the Jurassic coast. If you haven’t read the post about our photographic mini adventure you can find it here. In this post I will go through the editing of the Jurassic Coast image and show you my workflow from RAW to finished file.
The photography process
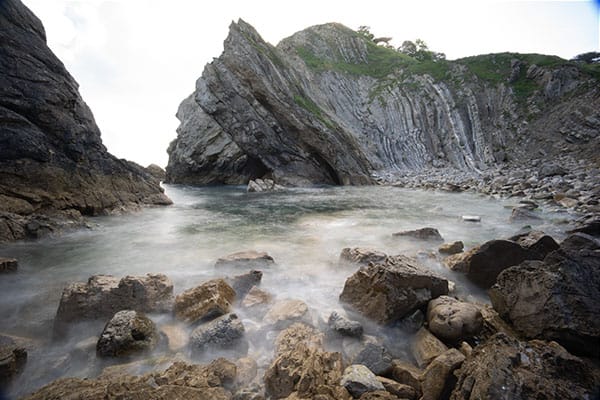
It was a blue sky day with a few clouds on the horizon when we photographed this scene. Due to the lighting we decided to wait until late in the afternoon as the top down lighting is certain death to most moody landscapes and also, it is too bright for long exposures even with the ND (neutral density) filter on. As the sun went towards the horizon the clouds came up and we got to work.
I photographed various exposures of the scene with my camera on the tripod. The longest I was able to do was 4 seconds as even with the aperture at f22, ISO at 50 and an ND filter I couldn’t go slower. I timed the exposures to go when the small waves were breaking. This meant I could achieve a bit of the misty effect I was after.
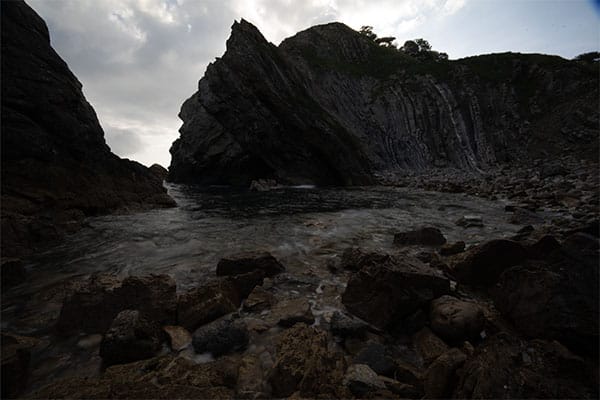
I also did some other stopped-down images at the same time to expose the details in the clouds which were bright and would have been ‘blown out’ (overexposed) in the main exposure.
The Initial Photography Editing Process
I started by editing the raw files separately. The main misty image has some shadows lightened and clarity added all over.
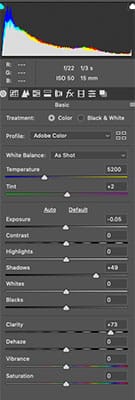
After this I went to the adjustment brushes and brightened up and darkened down (burn and dodge) various rock surfaces to add a more 3 dimensional element to them. I dodged the water to lighten the mist and added texture with the clarity slider. To get the green “toxic water feel”, I increased the saturation on the already green water.
Combining the 2 Images
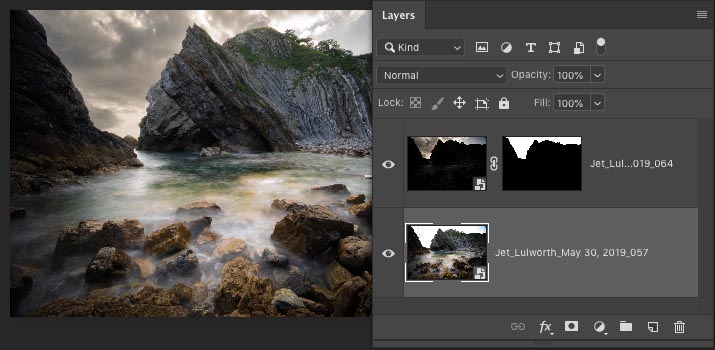
To get the dark sky into my final image I opened both images in Photoshop and dragged the dark sky image into the misty sea scene.
Pro Tip:
When you have finished editing in the RAW file converter hold down the Shift key while you click the open image button. This changes the button to open object. When your image open in Photoshop it will open as a RAW smart object. When you wish to change the image in Photoshop just double click the Smart Object layer and it will open the layer back in RAW. Total non-destructive editing.
If you photograph both images without moving the Tripod then they will be exactly the same composition and if you drag one image in Photoshop onto the other whilst holding the Shift button down they will align exactly. If however your camera moved between the images then all is not lost. Select both layers ( the misty image and the dark sky image, and go to the Edit menu in Photoshop and choose Auto-Align Layers. This will automatically align the layers for you.
I used a selection tool to select the sky area and then added a layer mask to the top layer. This hides the areas of the image that are not sky on the dark sky layer.
Final adjustments in photoshop
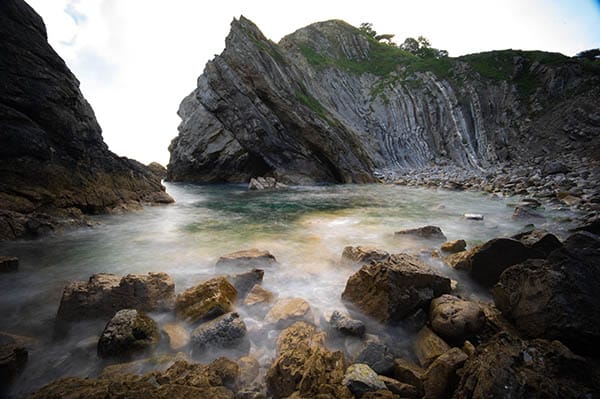
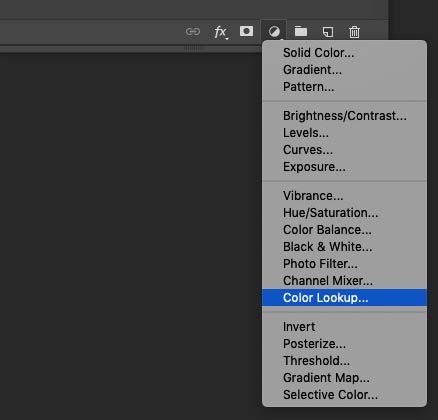
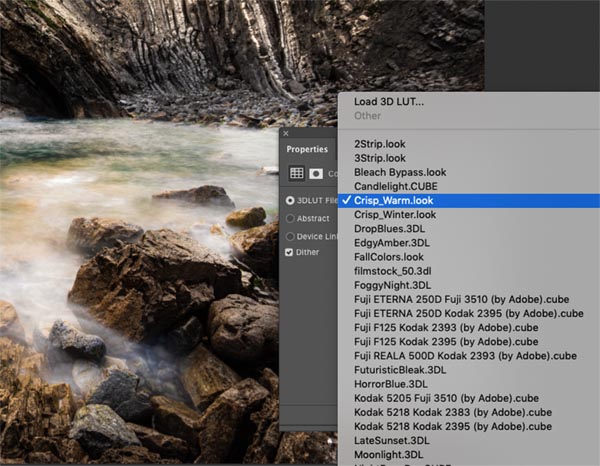
The last things I do are to add adjustment layers to bring the images together. My favourite is to either use a warming photo filter for a warm reddish tinge or use one of the LUTs. These are Colour Look Up Tables that can give a overall colour and contrast look. My favourite is the Crisp warm look LUT.
And there you have it. I finally saved the image as a PSD file so that all the editable items (layers, masks, Adjustment layers and Smart RAW layers) would remain editable.
I was rather pleased with the result. The final image was just as I had pre-visualised it, brooding and threatening as a Jurassic scene might be.
No Comments