

10 Sep How to do Darkroom Printing part 1
The joy of Darkroom Printing
Darkroom printing of Black and White images used to be the main way most photographers created their work. It was a rite of passage and everyone who did it will probably have a host of stories to tell. I know I do, like the time we would create a wall of flames around an unsuspecting printing colleague….. Enough of that now. I’ll tell you the full story later in this post. This post is all about the basics of Black and White darkroom printing and then in the next few posts we will go into detailed tutorials of various techniques – some beginner and some advanced. Like so many photographers who grew up black and white printing, first in a home or college darkroom and then in professional ones, Ally and I have a deep love of the darkroom.
This “how to” post is for those of you who grew up with digital and never experienced the incredible joy of seeing your print appear before your eyes in the developing chemistry. This is also a reminder for those of you who used to print and long for the old days, of how satisfying it was when you emerged from the darkroom, after an evening of printing, with a stack of wonderful B&W prints.
If you are still toying with the idea of black and white photography and haven’t bought a camera yet have a look at the article Best film camera for travel photography on ImageExplorers site.
How does traditional B&W Darkroom printing work?
Black and white printing works by exposing light through a negative to light sensitive paper and then using chemicals to reveal the image.
The enlarger shines a light through the negative and focuses it on the baseboard of the enlarger. The lighter areas on the negative allow more light to get to the paper and produce a darker area. Darker areas on the neg allow less light so the paper remains white.
The photographic darkroom printing process uses paper that has a chemical coating – (this is called emulsion and is usually made up of silver salts) coated on one side that is sensitive to light, but not red light. When exposed to light a latent image is formed and this is then developed in chemical developer. This development process is then stopped using another chemical called a stop bath. Finally the chemical process is fixed using a chemical called fixer and the chemicals washed away with water. The paper can now be viewed in normal light.
Finding a B&W Darkroom to use
We were very fortunate as there is a community darkroom in the middle of our city. For a very reasonable monthly fee you can use the darkroom as much as you need. Ally bought me several months of access for my birthday. Awesome present! I was shown the darkroom facilities, called SPACE in Colchester, UK by the very amiable general manager called Jack Briggs-Miller.
Many towns and cities have similar setups but if your town does not you might try the local camera clubs. Of course, you could always build your own. A light proof room with running water is all you need. I can’t count the number of times I have blacked out windows in bathrooms to use as a makeshift darkroom. Enlargers are relatively cheap and the whole lot including trays can often be purchased off eBay for a song.
Getting started
For advice on loading the film into your camera have a look at our how to load film post.
Processing your Negatives
We will do an entire post on negative processing with techniques for beginners through to advanced. This will include topics ranging from what chemicals to choose, how to load a negative into a dev tank, times and temperatures, through to advanced topics like chemistry variations for fine grain and Mackie line effects to sharpen your negatives.
For advice on choosing a film for black and white photography we have a post that will help.
To start off though I would suggest sending your film to one of the numerous postal developing labs that will dev your negs. Most offer a push / pull (over or under develop) service as well as contact sheets. some will even do “clip tests” (cut off a piece of film and develop it to see if the remainder of the roll needs pushing or pulling).
Do a Google search but check out the TrustPilot reviews of lesser known labs to see what others think.
You will need to buy some photographic light sensitive paper.
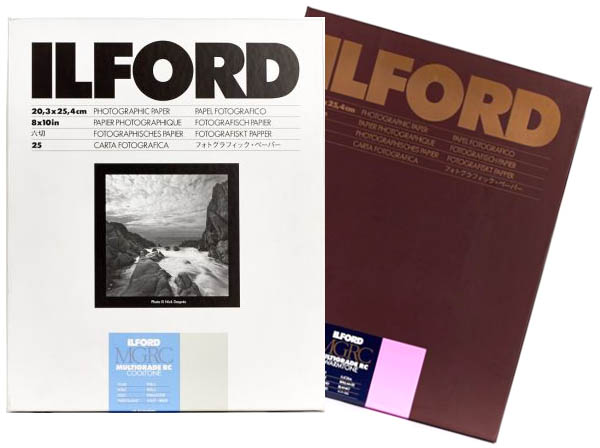
There are 2 main types – FB or RC.
- RC stands for Resin Coated. This resin coated paper is ideal for anyone starting out printing as you can judge the exposure while it is still wet and it doesn’t take too long to wash. The other benefit is it dries flat
- FB which stands Fibre based is the usual choice for art or archival prints. The emulsion is coated onto archival paper and will hopefully last a lifetime if washed properly. Most FB papers have an excellent black density. The downside is it takes a lot of washing and it “dries down”. This means the blacks get darker when it’s dry making it difficult to get your exposures correct.
Your next choice is between Graded or Multi-Grade
Graded and Variable or multi contrast papers are as the name suggests, all about contrast.
- Graded papers come in 5 grades. If in doubt start with the middle grades.
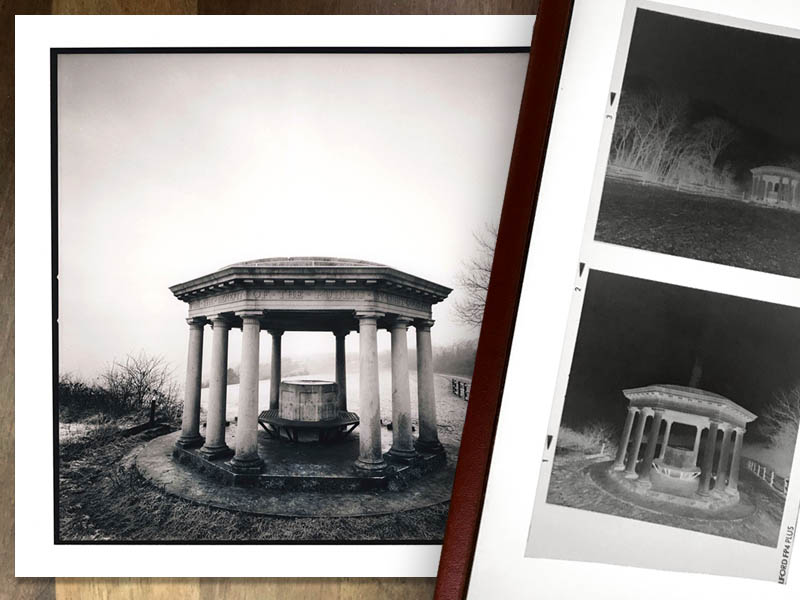
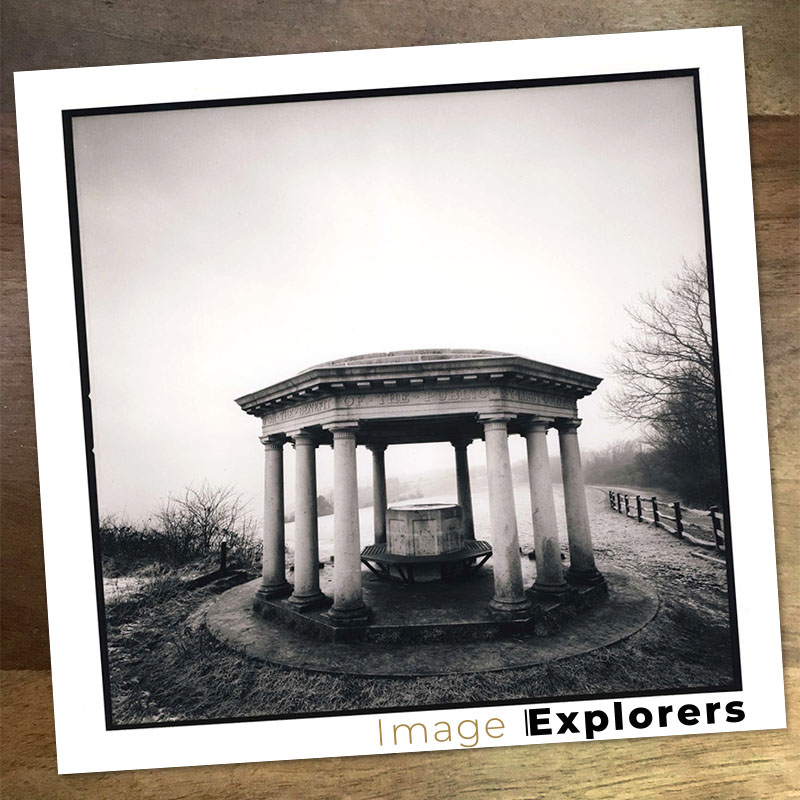
- Variable or multi contrast papers are much easier to use however you need to have filters to change the grade. These can be bought reasonably cheaply from photographic suppliers. You can also use a colour enlarger with multi-grade and use the colour controls to change the contrast. I like this option as its easy for me to “dial in” contrast when I’m burning in. I did this with the image above so the sky and background was burned in with more contrast while keeping details in the white stone that had less contrast.
We used a company called AG Photographic in the UK. We bought both our film and paper there. They are very helpful and supply all things for traditional photographic darkroom printing. We don’t get any kickback from this link. We just think they are an amazing company that needs to be supported.
In the Darkroom
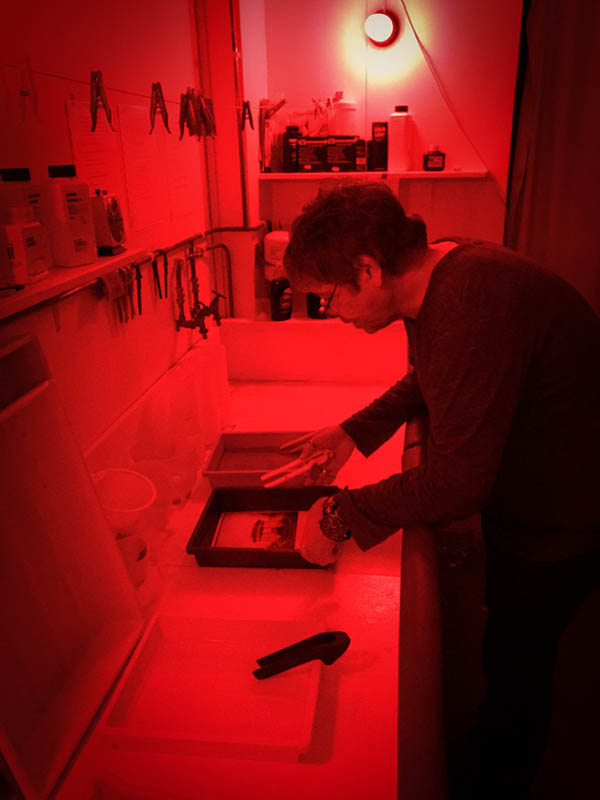
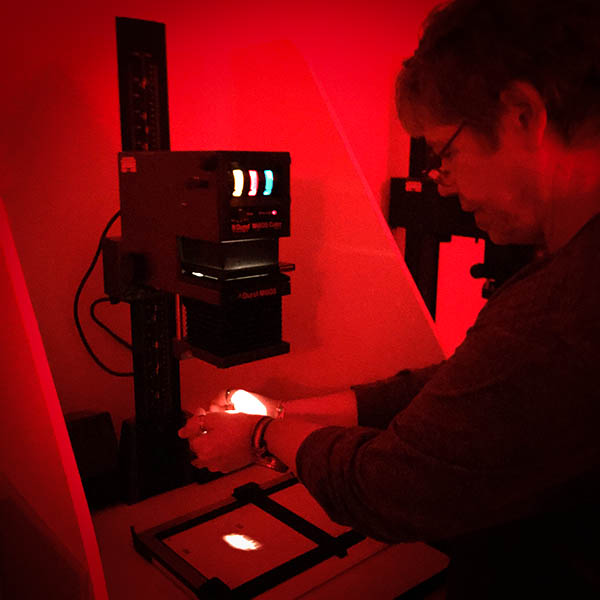
Once in the darkroom there are a few things to be aware of. Make sure the room is light tight and then switch on the red safe light. Photographic Black and White paper is not sensitive to red light so it won’t fog (expose) the paper.
1. Place the negative into the enlarger carrier tray. Make sure the neg and carrier are dust and fingerprint free.
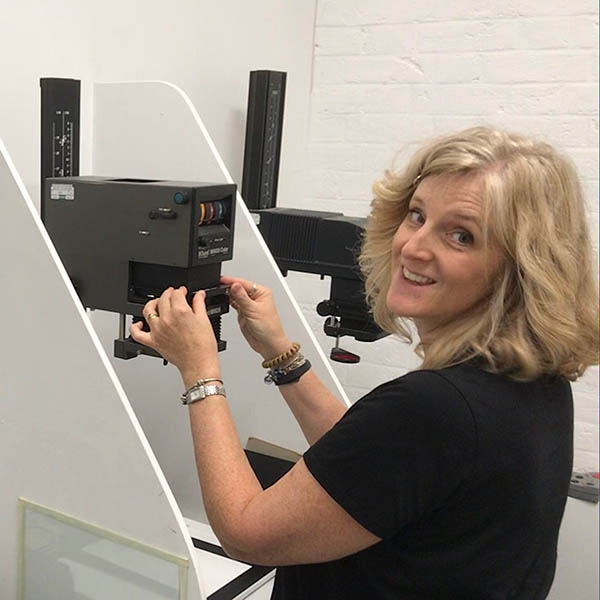
2. Focus the enlarger on the baseboard. Open the enlarger lens to max so you can see what you’re doing. This will also help the focusing as it will show a narrow depth of field. There are various focus aids you can buy to help with this.
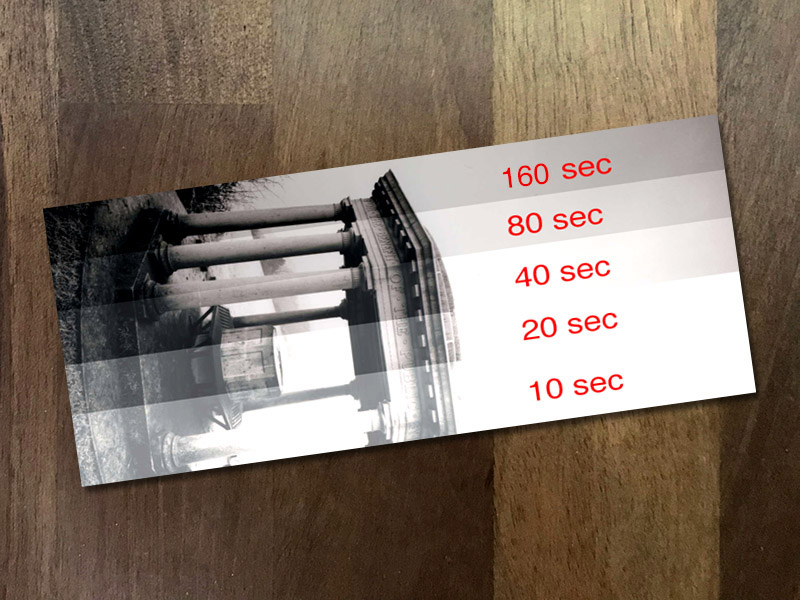
3. Stop down the lens 3 stops. Switch off the enlarger lamp and place a small strip of photographic paper on the baseboard. Set the enlarger timer. I usually start with 10 seconds. Expose the paper for 10 seconds and then cover a quarter with a bit of card – do another 10 seconds. Keep going so you’re doubling the light every time ie: 10 ,20, 40, 80 seconds etc.
4. There will be three trays of chemicals. Developer, Stop Bath and Fixer (known as Hypo to really, really old photographers). Pop the test strip in the developer and very gently swish it around for about 1.5 mins. Your image will appear before your eyes. Then put it into the stop bath. This stops the developer. Finally into the fixer for a minute and then give it a quick rinse in the water. If your box of photographic paper is safely sealed up, you can now switch on the white light.
5. Look at your test strip and decide on which one is correct. You might need to do another to get it perfect. Also look at the contrast on the strip. you might need to increase or decrease it using different grade papers or adjusting your multi grade filters.
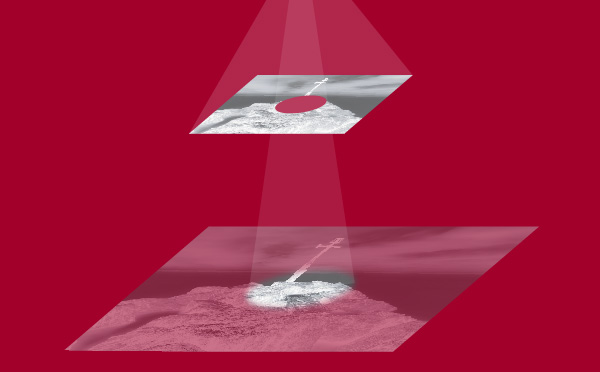
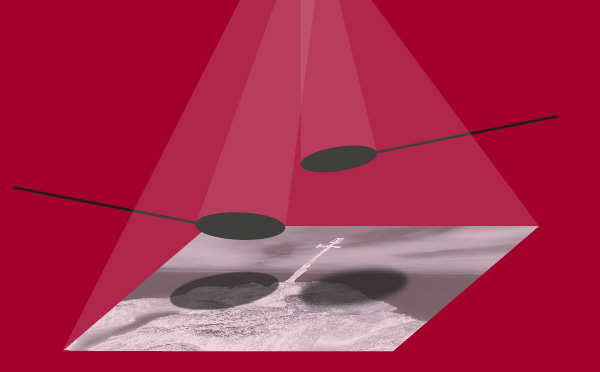
Once you have the correct exposure and print you can then darken in (Burn) areas by adding a little bit more exposure to certain areas. For this, a piece of cardboard with a hole works well, or I cup my hands under the enlarger and just let the light through in areas I wish to burn. You can lighten (Dodge) by stopping light with cardboard during the main exposure. Most photographers use a black circle of cardboard attached to the end of a wire.
You can find out more about Dodging and Burning by looking at this post of ours.
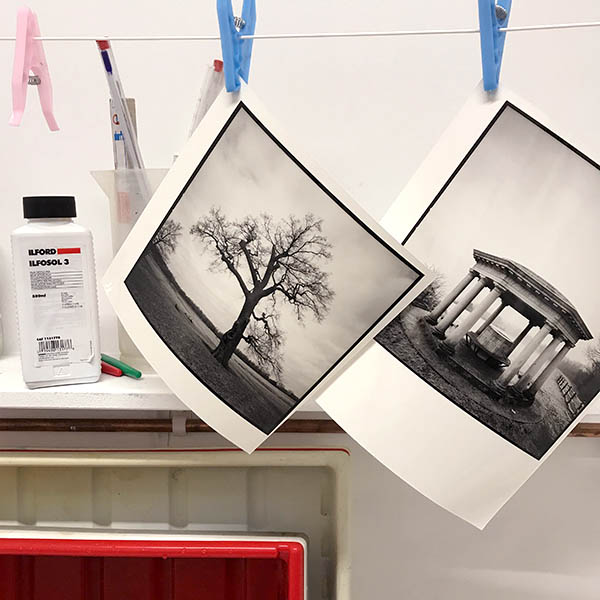
When you have done your final RC print give it a good few minutes was in clean running water. Don’t over wash as it can cause water to seep in-between the rc layers and cause swelling. (FB papers need a lot more washing.) Hang your prints up to dry or pop them in an electric dryer.
That’s it. You have now created your first awesome Black and White darkroom print and are probably, like us, totally addicted.
So lastly the fire in the darkroom story. well…..
When I was a crime scene photographer for the Met Police (Scotland Yard) in London UK, I spent a lot of time photographing finger marks on objects from scenes. This was an art in itself, Sometimes the finger prints were in blood, sometimes dust or if a fingermark was on plastic eg, a car dashboard, then the fingerprint team would put it in a tank and coat the plastic with superglue vapours. We would then photograph the result. We used all sorts of lighting from high power lasers that required heavy duty filtered goggles through to the humble touch. Whatever would do the job. We made the photographs of these marks using 35mm Nikon film cameras with macro lenses and black and white Ilford FP4 or Kodak T-Max 100 film. Sometime we used a Sinar 5×7 large format mono-rail technical camera as well (in the days before digital came along.) We would then dev the negs and darkroom print the final black and white image of the fingermark.
Now this sounds very exciting and it was….for the first few weeks however, anything done in repetition gets boring and when you have boredom you need to find ways to get through it. In our department this was done by playing tricks on each other.
The darkroom housed 9 enlargers ranging from a beautiful Leica 35mm to a huge Durst large format beast. These were situated around the edge of the room with the trays (large 20’x24′) full of fresh chemicals in the middle. As this was a very busy professional darkroom it was designed with a bit of a maze of black painted corridors to keep the light out and no doors or curtain so photographers could rush in and out for a speedy workflow.
So … the perpetrator of the prank would nonchalantly wander into the darkroom whilst squirting a long trail of lighter fluid on the floor. (We used it to clean negatives.) Most people, when printing, go into their own little world and the chemistry smell was so strong it masked the lighter fluid so it was easy to spread it around without being spotted or smelled. After making sure that the liquid was in a ring around the feet of our ‘victim’ and out the door the fluid would be lit…. and a mini wall of flame would shoot down the darkroom corridor and around the unsuspecting photographer concentrating on their work. After much panicked shouting and then swearing the ‘victim’ would storm out the darkroom to be confronted by a sea of laughing colleagues.
Health and safety? What was that?
Ahh. Just another day on the job.
No Comments