

05 Mar Black and White Beach Photography
Black and White Beach Photography
Black and white beach photography can be a really cathartic experience. Standing on the rocks hearing the crash of waves, feeling slight spray whilst watching the sun come down, can help the day’s worries just evaporate! After this blissful experience, you get home hoping for some gorgeous black and white masterpieces that you envisaged, but sometimes you end up with grey, lifeless images.
Let us show you 5 techniques that we use to get around this problem, when doing black and white beach photography. These will ensure that every time you go down to the sea, you will come back with unique photographs to be proud of.
During our recent trip to Cape Town, South Africa, Ally and I took a day trip to a tiny beach called Slangkop. (This means Snake Head in Afrikaans.) If you’re looking to go there, it is right next to a small village called Kommetjie. There is a beautiful old lighthouse there that dates back to 1919. This 33m high round cast iron tower looks so interesting from a distance that we hoped to get some amazing images of the area. We arrived mid afternoon and stayed until just after sunset. As you will see from the images in this article, the lighthouse was probably the least interesting thing to photograph, mainly because it closes at 3pm and is surrounded by a huge ugly electrified and barbed wire fence.
Why use black and white photography
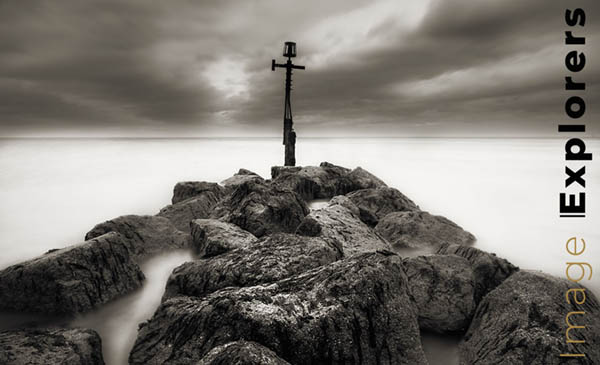
One of the joys of photographing along the shoreline are the subtle colours one gets from the turquoise of the sea to the orange of the setting sun reflected off of rocks to the pale tan sand. It’s a watercolour painter’s dream, so why would we want to give up these amazing subtleties for a black and white image? There are a number of reasons, but the main ones we find are it forces you to look at the shapes of your scene and we end up with much better compositions.
Black and white can give you incredible dramatic images that any colour can dilute.
Everybody has taken photographs of the beach. Sofor your images to stand out you need to present them with something that’s not been seen hundreds of times before. Black and white photography will do this.
The 5 top techniques we use
1: Photography in the Golden Hour
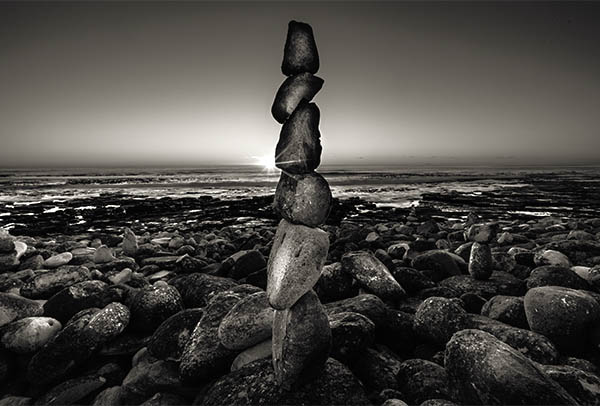
The golden hour is the hour before sunset and after sunrise. It gives colour photographs a beautiful soft warm colour cast that is really desirable but what does it do for black and white photography? Well, we love shooting in the golden hour because the lighting gives objects a wonderful 3D feel with long and dark shadows. All the textures on rocks just come to life and even sand takes on a new textured look.
2: Silhouettes and contre-jour lighting
Of course the golden hour is perfect for photographing contre-jour. For a more in-depth look at contre-jour look at our article here. By photographing into the sun you will find the scene take on new and interesting shapes as the light just touches the rim of objects, throwing the rest of the object into darkness. With large areas of darkness you can create mystery in your images as it leaves the viewer’s brain to fill in the details. Be careful with the extreme lighting as it’s really easy to totally blow out (lose all detail) in your highlights. If you’re photographing in an auto mode be careful as your camera could be lying to you by giving you the wrong exposure. Exposure compensation is your best friend in these situations.
There are so many interesting things on the beach to photograph and some of them take on a totally different look and feel when photographed as a silhouette. The stacked rocks have almost an alien world feel to them.
3: Details, details, details
The shoreline is like a fractal. The more closely you look, the more detail you see. Worlds within worlds. So why just photograph the big world everybody else is doing. Look at the details and sometimes some of the most interesting landscapes can be found there. Rocks and sand have so many beautiful textures on them but our favourite textures are to be found on old metal. When doing texture photography we look for old rusted structures wherever we go as they always give wonderful detailed images.
4: Polarising the light and filters
One of the must have filters for any outdoor photography is a polarising filter. A polariser will do so many things to both colour as well as black and white images. For our black and white beach photography we use it mostly to darken the sky. However it is also very useful for getting rid of reflections.
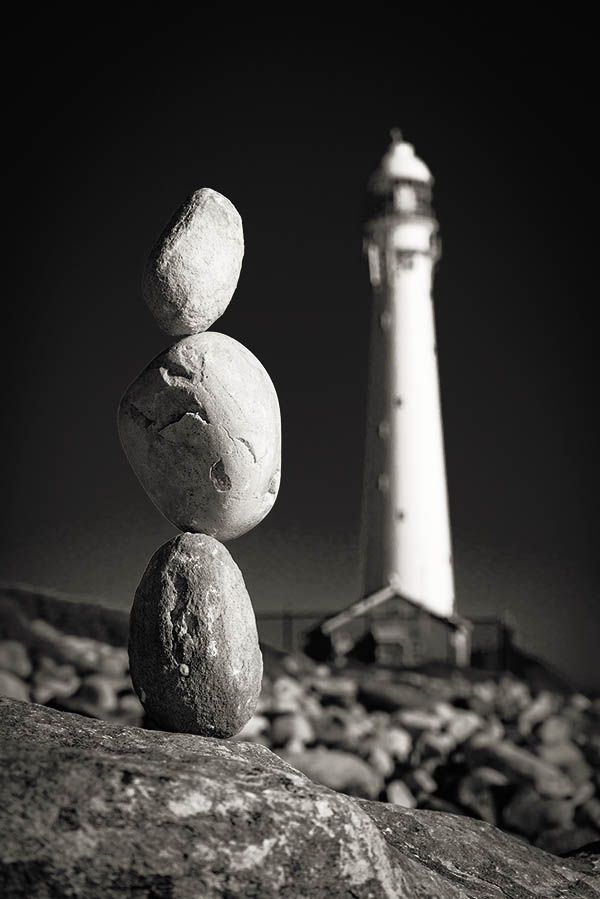
Slangkop lighthouse with a dark sky created by the polarising filter
The other filters we use in beach or any landscape photography are red or orange filters. This filter also darkens the sky (black and white photography only). We always have a UV filter on our lens to protect it as well. The protection is not just about damage either. Sea spray on your lens will degrade the contrast of the image and its so much easier to swap to a clean filter halfway through your shooting rather than trying to clean a lens in sandy sea spray conditions.
Be wary however of ‘stacking’ multiple filters on your lens. Unless they are the very expensive multi-coated variety, you will lose quality especially when photographing contre-jour. With wide-angle lenses you will also be adding a vignetting effect.
5: Neutral Density Filters for misty movement
Another technique is to use a long exposure to get a misty water movement. An ND filter will cut the light coming through your lens allowing you to do really long exposures that give the water a misty ethereal effect.
Don’t forget to use a stable tripod for these long exposures. Even the smallest bit of wind can cause subtle movement and ruin an otherwise perfect image. Usually, we try to put the tripod on rocks or really hard compacted sand to keep it totally steady.
If you are using film be aware of your exposure and reciprocity law failure and compensate accordingly. Depending on your exposure time you might even end up doubling the length of exposure to compensate. If you are not aware of reciprocity law then just bracket your exposures like mad.
Extra techniques – safety for you and your camera
The coastline and your camera don’t mix very well. Salty sea-spray will corrode your pride and joy so very quickly. Keep it out of the spray or sea mist as much as possible. This might mean keeping it in a bag when you’re not shooting or, if the spray is really fierce then put a clear plastic bag over it. (The ones you get for keeping food in work well.) Just cut a hole for the lens.
Be aware of changing lenses in areas where sand is blowing around. Once again sand and sensors don’t play well together.
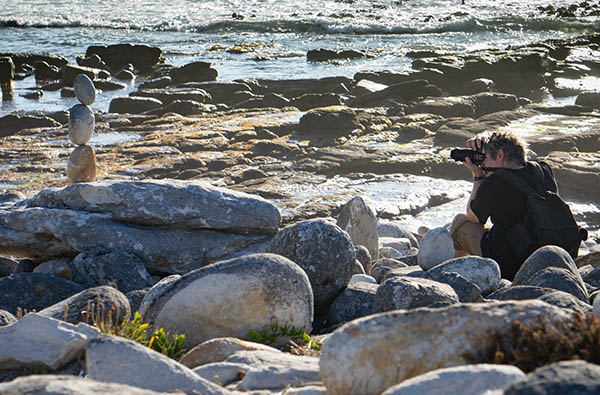
Be aware of your surroundings. When we were photographing at Slangkop, I was so busy with an image that I didn’t see a very shifty looking person hovering around eyeing our stuff. Fortunately Ally was there, and some locals arrived too, so he scuttled off but if I was on my own things could have been very different.
Extra techniques – what settings should I use for best beach photography
We are doing a whole series on aperture, shutter and exposure compensation articles in this blog but the main thing about beach photography is that your camera can be fooled very easily. The bright sand and reflections off the sea make the camera think that there is more light than there really is so your images can turn out slightly underexposed. If in doubt, bracket a lot.
370,000 miles of unique possibilities
Around our planet there’s approximately 370,000 miles of coastline from stunning long sandy beaches to ragged cliffs. There is just so much variety and so many options to create unique and exciting images. Be safe, look for the less obvious and craft your own black and white beach photography and masterpieces every time.
Karl Walduck
Posted at 19:01h, 28 MarchThanks for all the advice, I’ve been using a camera phone 12mp and a point and shoot Sony Cyber-shot 18mp, but am now the proud owner of a d80 Nikon and a tampon 70-300, totally awesome and am so grateful to have such a wonderful interest, I’m looking forward to next week’s pay to get myself a set of filters ☑️🏆👍