

20 Nov Why you should Sharpen your photos
Why you should sharpen your photos
“BUT MY CAMERA IMAGES ARE SHARP! Why should I sharpen my photographs?” This is a common question I hear all the time as an Adobe Photoshop trainer and lecturer. The other question that goes with this one is, “Why do ‘Pro’ images always look so much crisper than mine? I have the same camera?” I Know it seems very odd that when you have spent so much money on a camera and lens with awesome autofocus systems that you might still have to sharpen your photos. Fear not, for we will explain all! Firstly we’ll look at the why and then the how.
If you are reading this article on a phone you might need to zoom in to see the subtle details of sharpening on the images
Why your photographs need sharpening
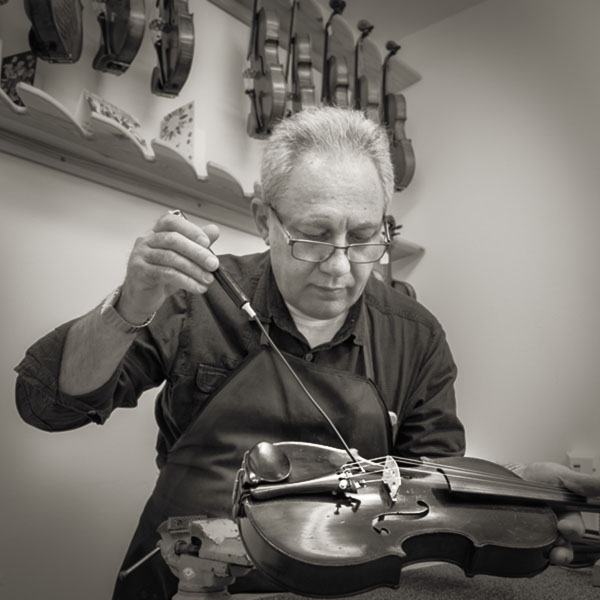
Before sharpening
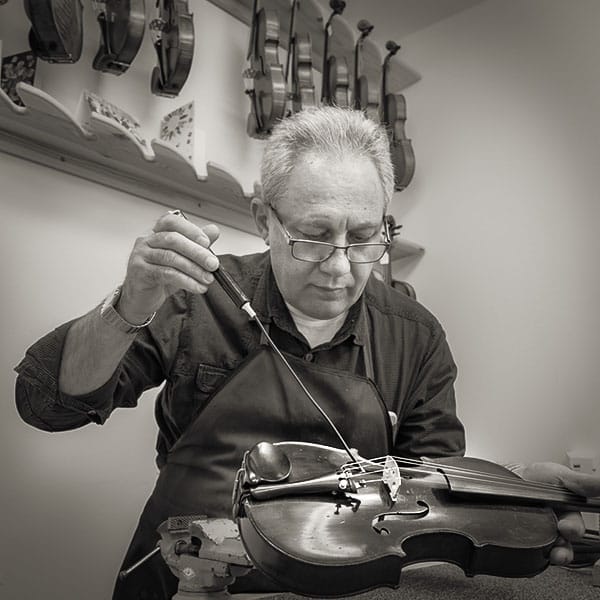
More skin, hair and violin texture after sharpening
Most (but not all) digital cameras have a filter in front of the sensor to deliberately, slightly blur the image recorded on the sensor. REALLY!!! This filter is called an anti-aliasing filter and it helps prevent moiré problems. This unsightly moiré effect can come about when photographing regular patterns for example on a subject’s clothing. The anti-aliasing (AA) filter helps to prevent this by slightly blurring the image.
If your camera is set to give you jpg images then the camera automatically adds some software sharpening to the image. If you are producing Raw files then it is up to you to add sharpening to the Raw file.
Which camera makes have this ant-aliasing filter?
Well most of the big brands have cameras with and without AA filters. Nikon, Fujifilm, Pentax, Canon and Sony tend to not have AA filters on the ‘Pro’ camera lines. Leica does not have AA filters on theirs. There are both good and bad things about not having AA filters though. No AA filter = sharper images but potentially moiré problems. AA filter = poss weird patterns on fabric
No AA filter – no sharpening then?
Err No. Sharpening images is still used on non AA filter images as it can really give your image a bit more ‘punch’.
So how does sharpening work?
With software
Software sharpening finds the sharp edges in your photograph and increases the contrast of the edges, This gives the image more defined edges and a look of being sharper.
With film
Photographic film can be processed in such a way as to increase the edge sharpness around objects. This is called the Mackie Line effect. One way to achieve this effect when processing Black and White film is to not agitate the film too often (maybe just once every 30 seconds). The developer gets depleted in the large areas but can work more in the other areas creating a sharper line between the exposed and less or unexposed areas. Find out more about choosing a film camera and loading film here.
How to sharpen in Photoshop
Every photographer has their own way of sharpening images. Some more convoluted than others. We’d like to show you just the 2 main ones.
Using the Unsharp mask
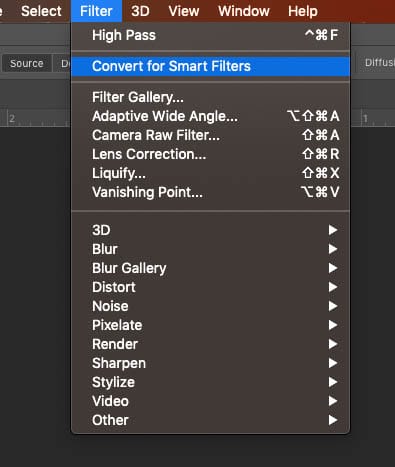
When your image is all resized and ready to print or go to web, open the filters menu in Adobe Photoshop. (We’re using Photoshop CC (Creative Cloud) version 2019.) So that this sharpening is not destructive we’re going to start by making the image into a Smart Object. Select Filters and choose Convert for Smart Filters.
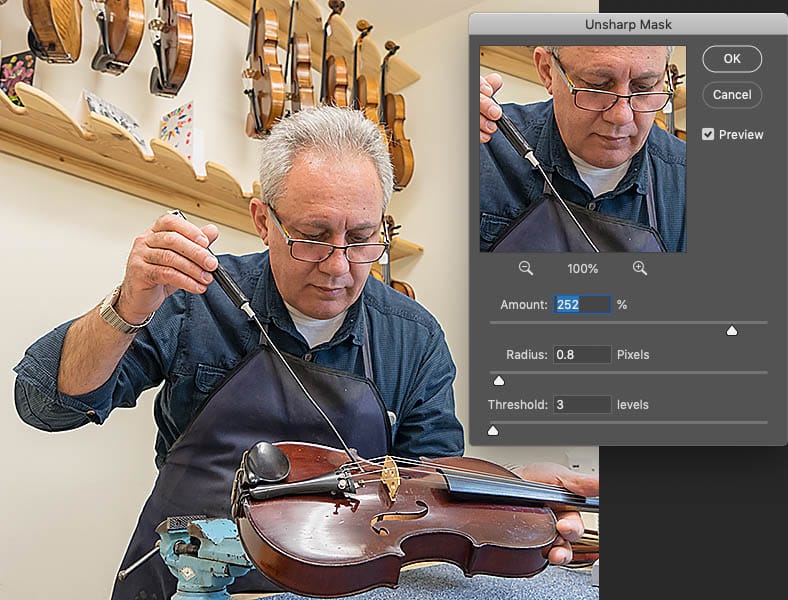
Then go to the Filters menu again, choose Sharpen and then Unsharp Mask.

Unsharp mask amount set to 100
Settings in Unsharp mask amount set too high

The Unsharp radius set too high
Keep the threshold and the radius very low – maybe in the 0.5 – 2 and 1 – 3 area respectively and then adjust the amount to taste. Most people work in the range between 50% and 150%
The lower the threshold, the fewer areas it will mask out and it will apply the sharpening to everything. If you find details that you don’t want sharpened being affected then increase the threshold.
The radius is the area either side of the edge details that gets affected. Use a very small radius on low resolution images.
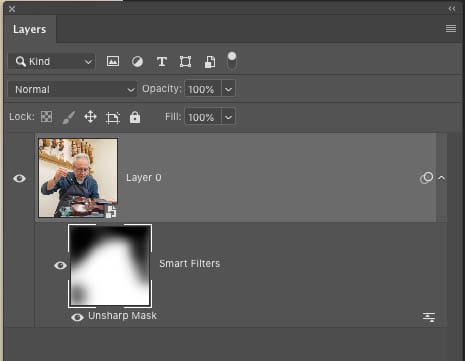
Paint on the mask of the unsharp mask smart filter to hide the effect
Using a High pass filter
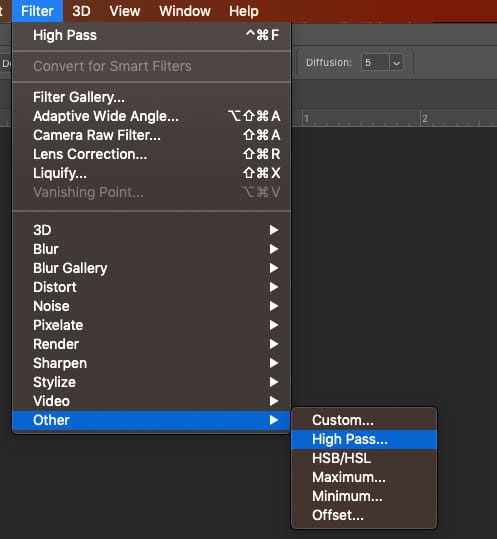
Th High Pass filter method is another sharpening technique that many people prefer. In Photoshop, duplicate the image layer by dragging the layer onto the new layer button in the Layers panel. Select the top layer, convert it to a Smart Object to make the filter non-destructive, and then go to the Filter menu, choose Other and High Pass.

High Pass on layer, finds and adds contrast to edges
In the High Pass settings use a low setting eg. 1.2. You can always change this later if you like, by double clicking the High Pass filter on the layer.
Change the Layer Mode to Overlay and adjust the opacity and High Pass filter to taste. If there are areas you wish to not be sharpened just paint them out on the layer mask.
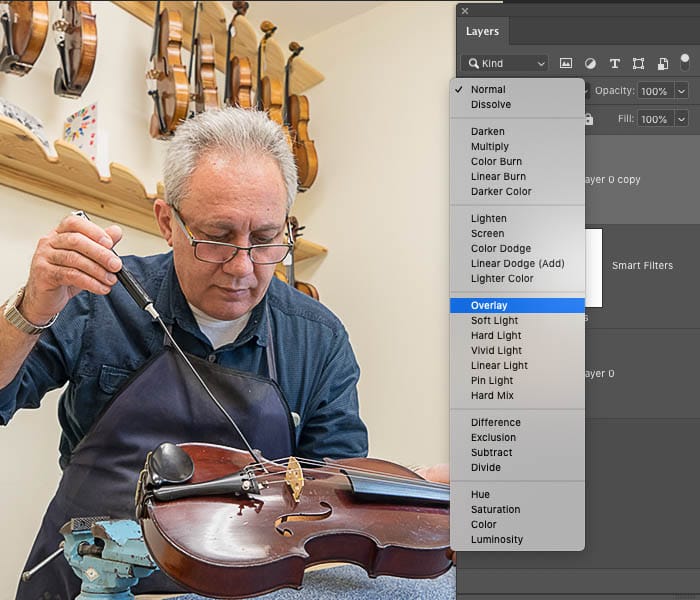
Overlay mode on layers panel to mix the high pass with the non sharpened bottom layer
Tip: The best way to see your sharpening is to view the image at 100% zoom. (In the View menu choose 100%)
Too much of a good thing?

A little too much sharpening has made an unsightly line around the castle
Be aware that not all images need sharpening and it’s really easy to overdo the sharpening on your photographs. Try to only sharpen areas that need it and mask out the bits that look overdone. That said, if you have never used these techniques you will be pleasantly surprised at the amazing results you get. Go forth and create awesome crisp images when you sharpen your photos.
No Comments