

17 Dec All the Essential Techniques for Silhouette Photography to Create Unique Images
Essential techniques for unique silhouette photography
Why silhouette photography
In this post we would like to show you all the essential techniques for silhouette photography so you can create very unique and awesome images.
Now the first thing we hear from a lot of photographers is “silhouettes? I don’t do those tacky things!”
However did you know there are different degrees of silhouette not to mention so many ways to create them and incorporate them into your work? Maybe you’re looking for an ‘in your face’ silhouette or maybe you’re looking for something a lot more subtle. We would like to help you to take whatever silhouette photography knowledge you have on to a new and exciting level with our list of techniques ranging from the basic camera settings through to advanced Photoshop techniques.
Let us show you how to add the special interesting ingredients to your images.
We all struggle with certain scenes
Have you ever looked at a sunrise and thought to yourself – “It’s beautiful but I have seen so many sunrise images I probably won’t bother.”
Yes? Us too. No matter how gorgeous a sunrise / sunset is, it needs something else to make it super interesting.
Very often we will look at putting details in the foreground. This is fine as long as there is something worth including in your image. Sometimes we find that the foreground, while being interesting is so busy it takes away from the beautiful sky.
Why not try using a silhouette? They are easy once you get into them. If done well it will lift your image to a whole new level. You can always photograph your scene with and without the silhouette and you will have nothing to lose.
The techniques for creating perfect silhouettes
What camera setting to use for a silhouette (The basics)
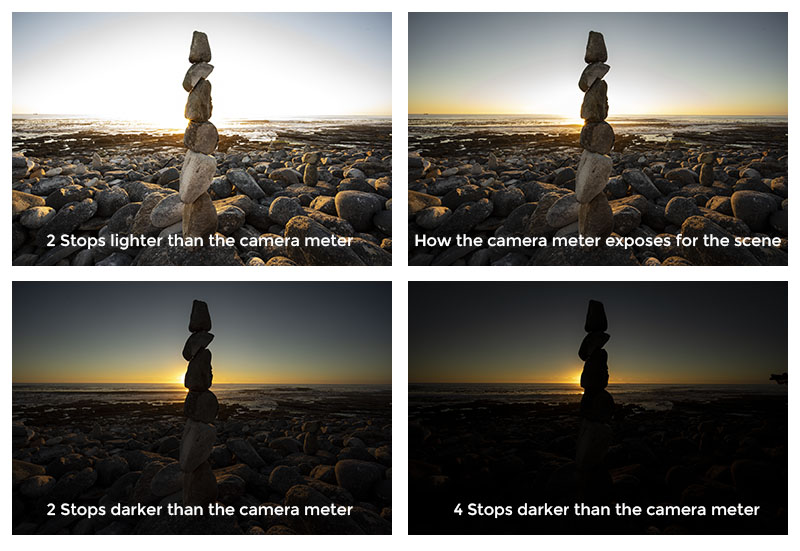
Silhouettes are surprisingly easy to create. A subject in the foreground that is usually in shadow and then the main scene very bright in the background. All good so far…. Now the camera settings. If you leave it to the camera in auto mode (P, S, Tv, Av, A, Auto etc) the camera software, which has been programmed to give you the main subject correctly exposed, will end up making the background overexposed (too bright) and the ‘silhouette’ subject showing details.
There are 2 ways to get around this problem.
Use manual mode (M on the camera settings). This means that you control everything from the ISO to the aperture and shutter speed. Why use this method? You have complete control of everything. This is the technique Ally uses for photographing silhouettes:
- Set the ISO to a medium setting eg anything from 100 to 400. (We can change this later if need be.)
- Set a shutter speed (not too slow as you don’t want camera shake – have movement in the image)
- Change the aperture until the camera meter shows the ‘correct’ exposure.
- Adjust the aperture and shutter speed until you are happy with the depth of field. – Remember, as the shutter speed goes faster to freeze movement then the aperture needs to get bigger to allow more light in. However a bigger aperture means less depth of field so your silhouette might be in focus but your background might be out.
- Now change the shutter speed to make it 2 stops faster. (You can experiment with faster or slower shutter speeds to get the best one.)
Use aperture priority (A on the camera settings). This setting means you set the ISO and the aperture, but the camera controls the shutter speed. Why use this method? As the sun or light changes, the camera will make adjustments accordingly. This is the technique Tim uses for photographing silhouettes. I normally do the following on the camera.
- Set the ISO to a medium setting eg anything from 100 to 400. (We can change this later if need be.)
- Change the aperture until it’s at the setting I want to use depending on my depth of field need.
- Change the exposure compensation control to -2 stops. (Try different exposure compensation settings to lighten or darken the scene.)
- (Although we are looking at mostly outdoor photography, if you are photographing inside a building, just put your subject in front of a window where the outside light is a lot stronger than the inside and use either method above.)
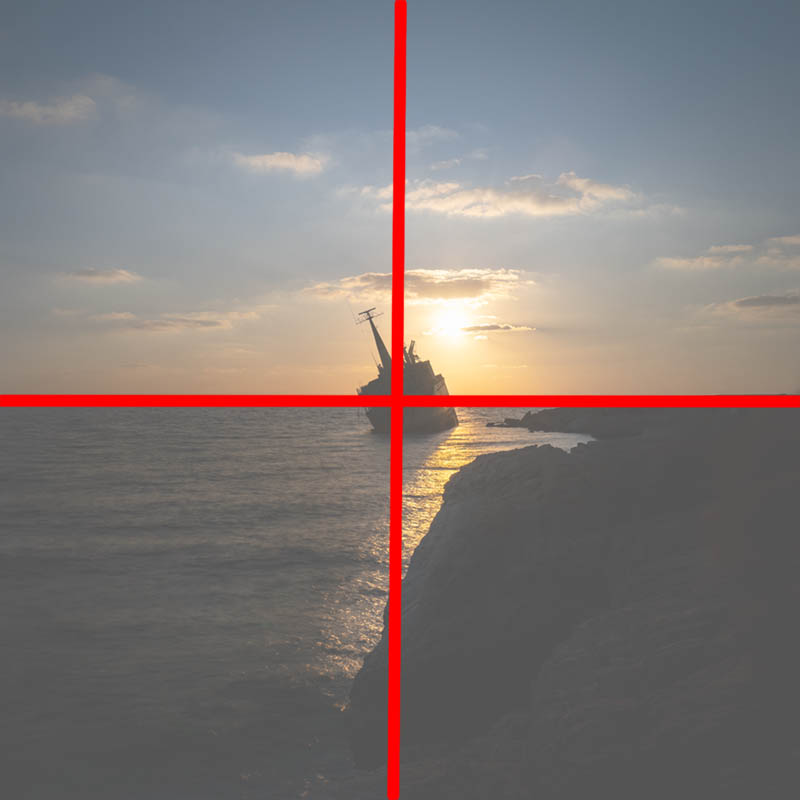
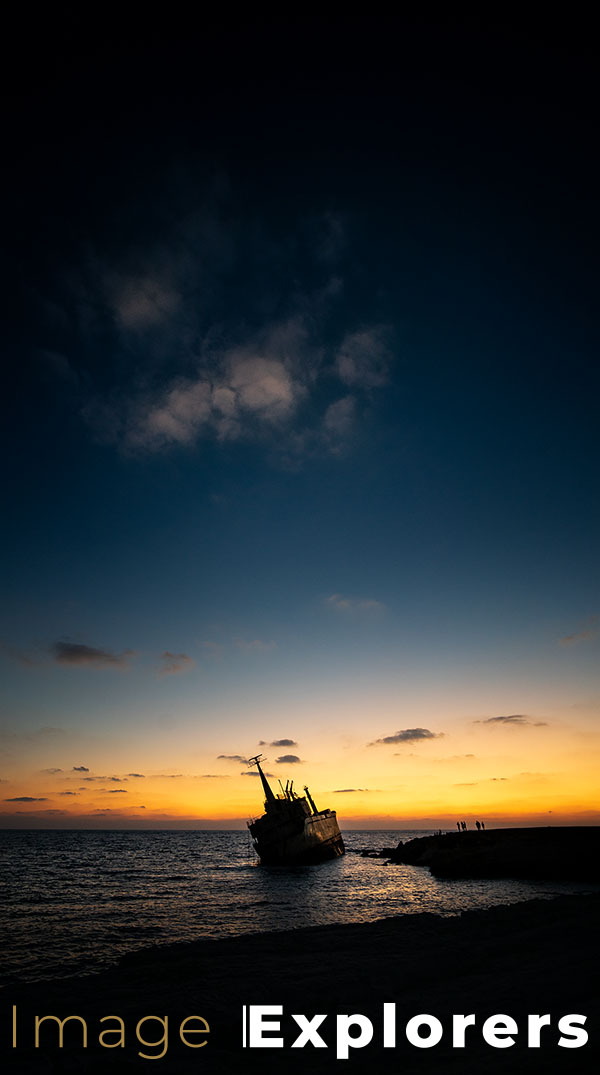
Put the sun behind a silhouette or into the frame
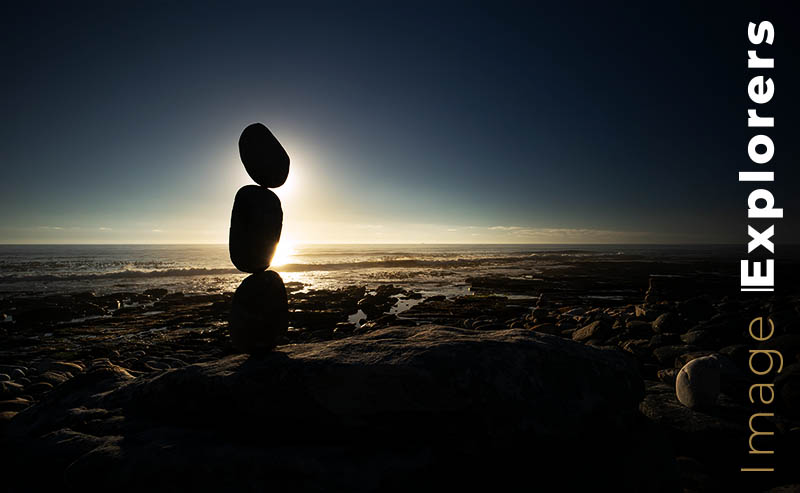
The first technique we will look at is the basic set up. It might sound obvious to some, but not everyone realises that to create a great photographic silhouette means you need a much brighter background than subject. The easiest way to do this is to face into the sun. Ally and I love our sunrise and sunset images and to have a dark outline in front of the awesome sky just lifts the image to a new level.
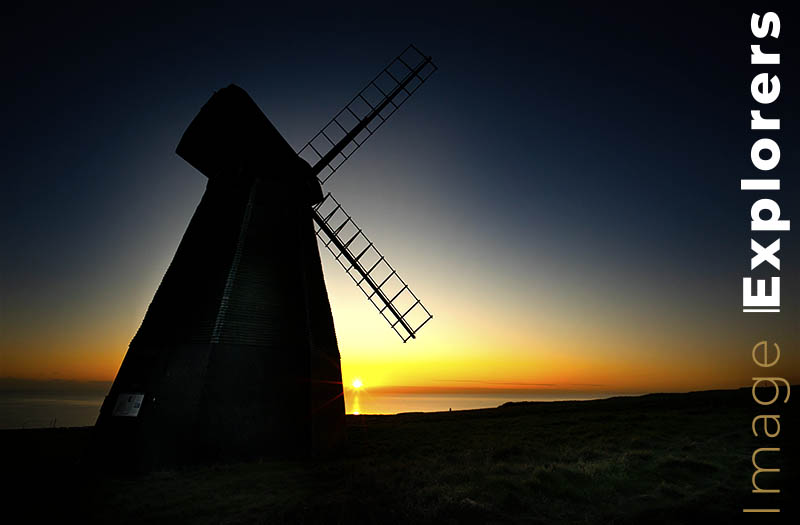
When we photograph low sun silhouettes, we sometimes hide the sun behind the subject which, gives the silhouette a wonderful glow. We also however sometimes keep the sun in the frame for a more dramatic effect. If you are going to be shooting directly into the sun do make sure your lens is scrupulously clean. Any marks or smudges will at very least degrade the contrast of the image or at worst add all sorts of nasty flares across your image. The protective filter is your friend here, as you can just remove it before photographing, and you should have a perfectly clean lens to work with.
Look for shapes and composition
Because of the lack of foreground detail in most silhouettes, the success of the image relies on an amazing background but equally (some would argue more) importantly, is the beauty in the composition.
A few traditional photography / art composition rules.
- Rule of thirds. Use the rule of thirds to place your most important or strongest parts of the image. This could be for example the horizon on the bottom third, or the subjects head a third from the top and a third from the left.
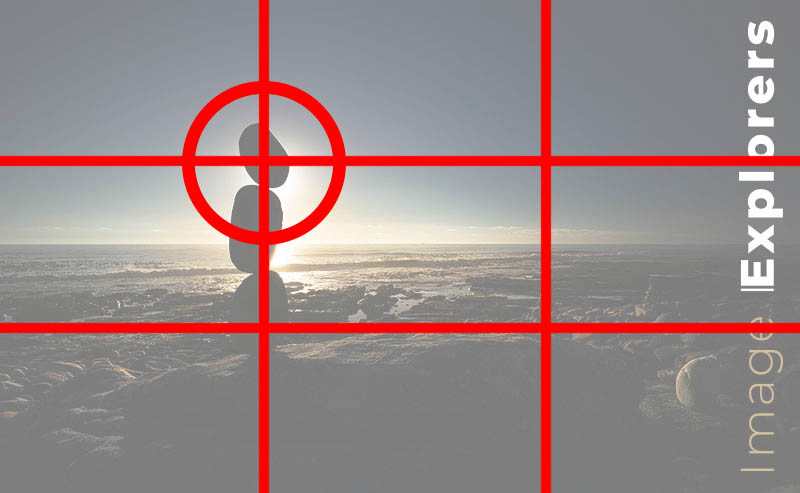
- Symmetry. Symmetry is a very powerful way of composing your image. The whole image could be symmetrical eg top / bottom or left / right. Anything that is not in symmetry is then very obvious and you can use this to your advantage to draw attention to something.

- Negative space. Negative space are the areas that don’t have anything in them. They help your main subjects to ‘breathe’.
- Lines leading your eye to the main subject. Try to find things in the composition that lead the viewer’s eye to the main subject so as the eye looks around the image it keeps returning to the main subject.
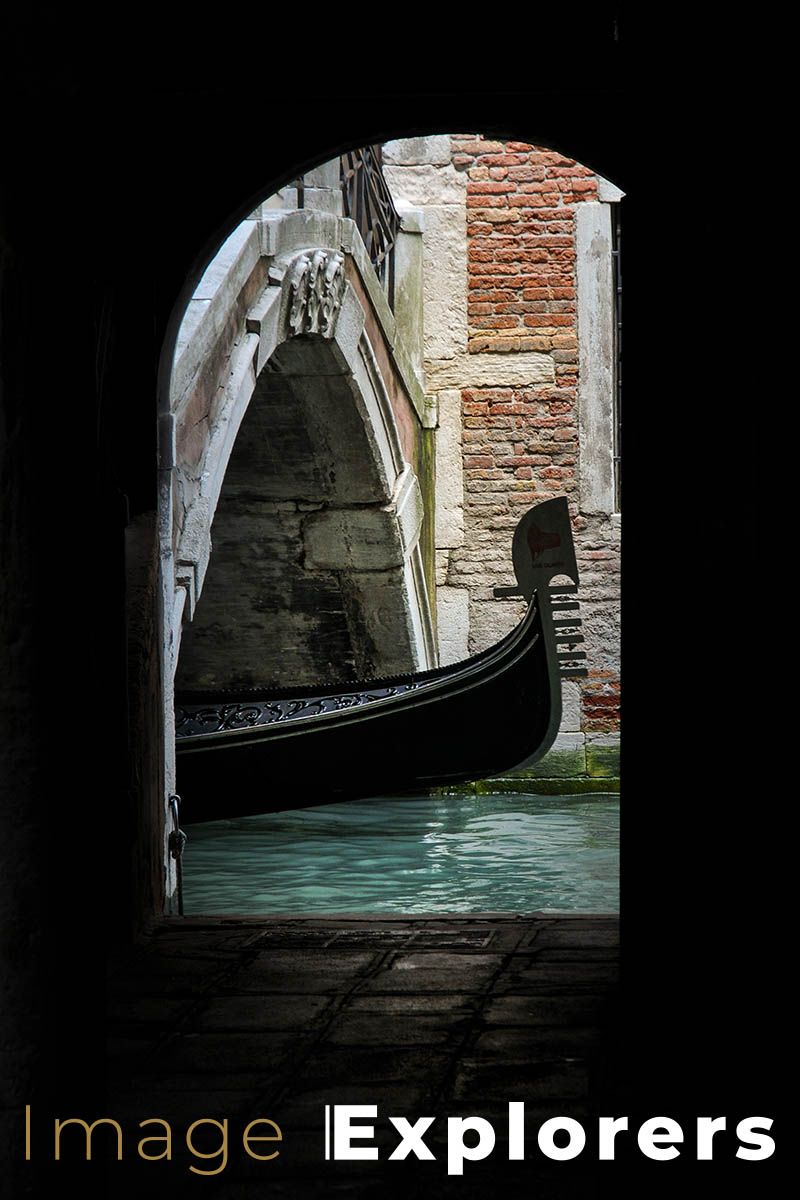
Use a Silhouette to frame the scene
One of the things Ally and I use is the framing technique. This is when the silhouette is not the most important part of the photograph but just the frame. A frame can be anything all around the scene or just part of it. We have used windows, cave entrances, building openings and trees as frames in the past. Remember however, the image needs to stand by itself. The frame should just augment the image.
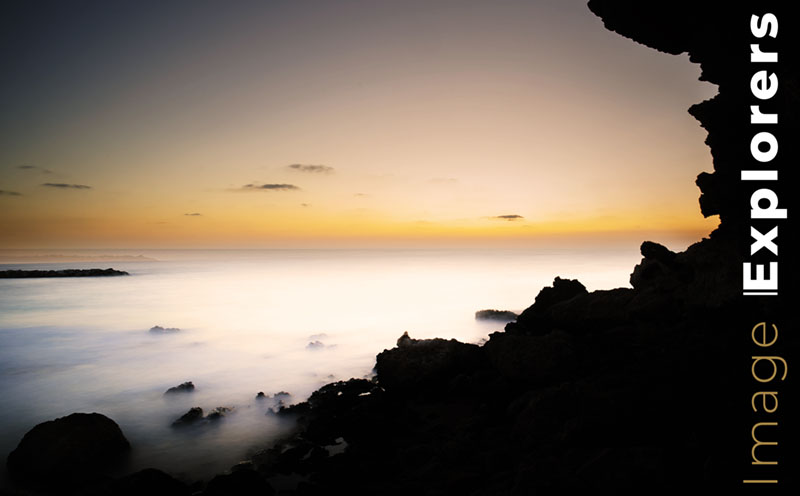
Shoot from a low angle
When photographing outdoor silhouettes it’s often a good idea to get down low. This will put more sky (the bright background) into your scene.
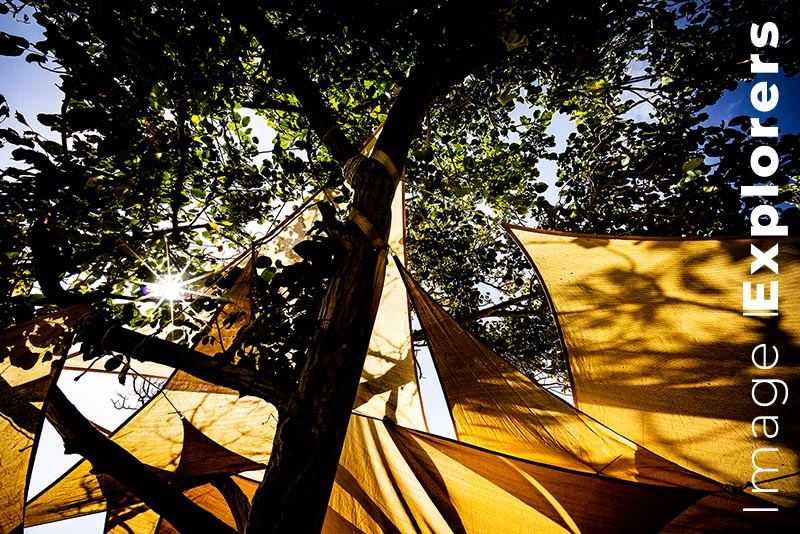
Add details to your shadows for an interesting silhouette
There is no right or wrong when it comes to silhouette photography images. We find mixing some details in parts of the silhouette can give really interesting results. Often we will photograph 2 images, one with a normal silhouette and one with more detail in the darker areas. These images are then combined into one in Photoshop. Another technique we use is to photograph the silhouette and then use the dodge and burn adjustments to bring back details in the Raw file converter.
Create your own silhouette with contrast
If you photograph in Raw you have a lot of latitude to lighten and darken parts of the image.
I usually do most of the heavy manipulation work with the Adjustment brushes in the Camera Raw file Converter.

For the Venice photograph I used a selection tool in Photoshop. (The magic wand too is my go to tool to a rough cut out.) This selection was then cleaned up with the select and mask tools and then I added an adjustment layer. If you have a selection and then add an adjustment layer the selection turns into a mask for your adjustments. Very cool. I used the curves to darken the foreground subjects but you could use brightness and contrast or levels to get the same effect.
Create your own Silhouette with 2 images
Now before we go into this next technique for silhouette photography we really need to look at where silhouettes originated from and what it really is.
A quick bit of history.
The word silhouette is derived from the name of a French finance minister who, in 1759 imposed severe economic demands on his countrymen. His name was Etienne de Silhouette and his name became synonymous with cheaply made products. Before photography was around, the cheapest way to record a person’s likeness, was to cut their profile out of black card. And so the silhouette was born.
So a silhouette is a subject represented as a solid shape, usually black and presented on a light background.
There is nothing set in stone to say how a silhouette should or shouldn’t be created so we can make our own, any way we like.
Now most people go about creating silhouettes in photography using the photographic techniques I mentioned above, however there is another way and I feel this way is in some way truer to the original ‘cut out the cardboard silhouette and paste it onto a light background’ method.
- The technique involves either cutting the donor image out and pasting it into the new image usually as a layer so it can be manipulated.
- Select the ‘donor’ image with a selection tool. I used the new Object Selection Tool in Photoshop to very quickly select the silhouette of me.
- This image is then copied and pasted (or dragged) into the new image.
- Easy as that: however, make sure things like perspective and size match correctly. Watch your cut-outs and use the select and mask options to clean up the edges.
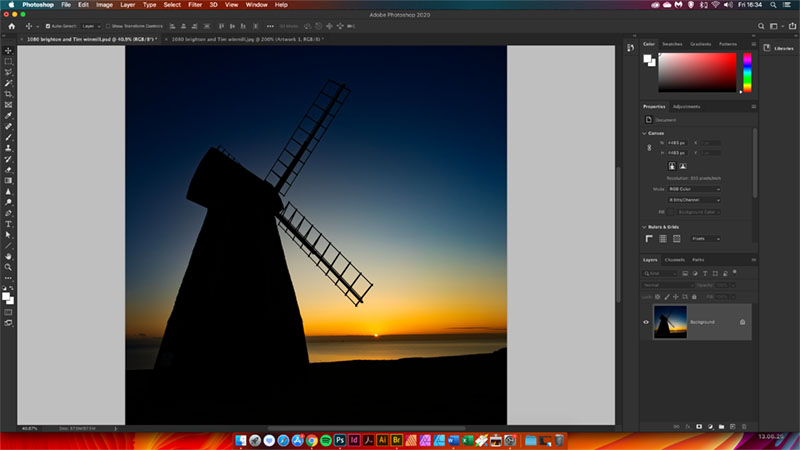
Original ‘Donor’ image.
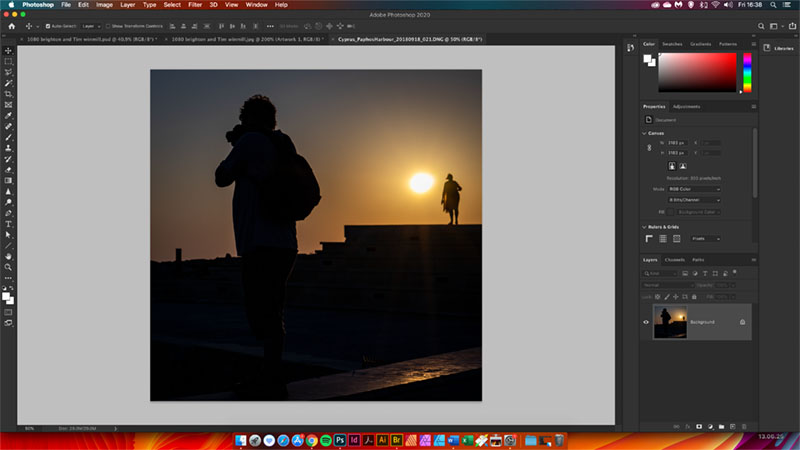
Original silhouette photographer image.

Select the photographer. I used a quick selection tool in Photoshop and then cleaned the image up with the Select and Mask tools.

Photographer cut out.
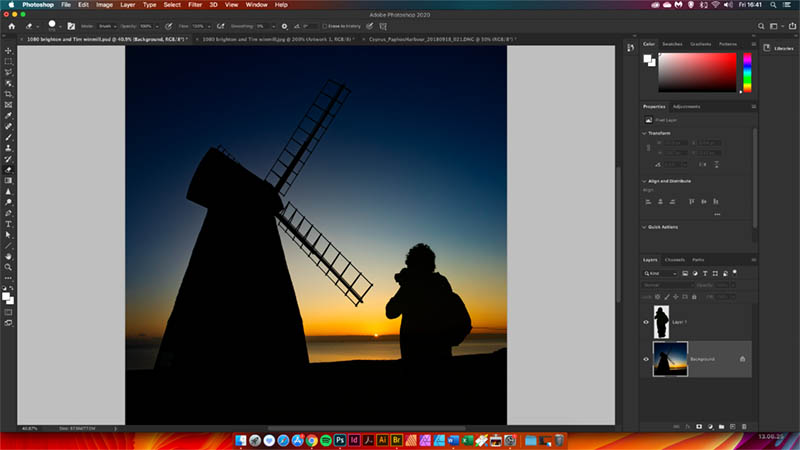
Photographer is on new layer. Position and scale cut-out so it looks correct.
![]()
Final composition.
Add an interesting sky to your images using a silhouette technique
This technique uses 2 images, one which will have an area with a dark ‘silhouette’ part. This image is then layered up on top of the other image and the mode on the top image is set to multiply.
Original image with white sky.
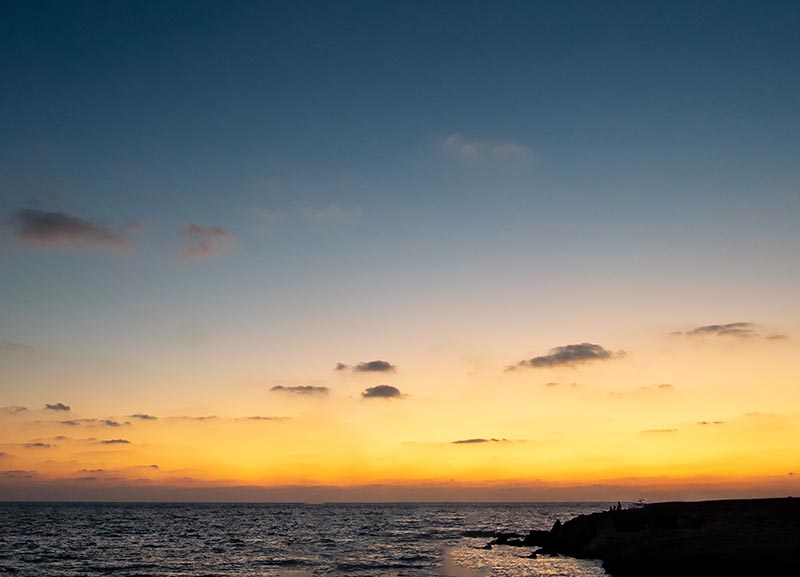
Original sky image.
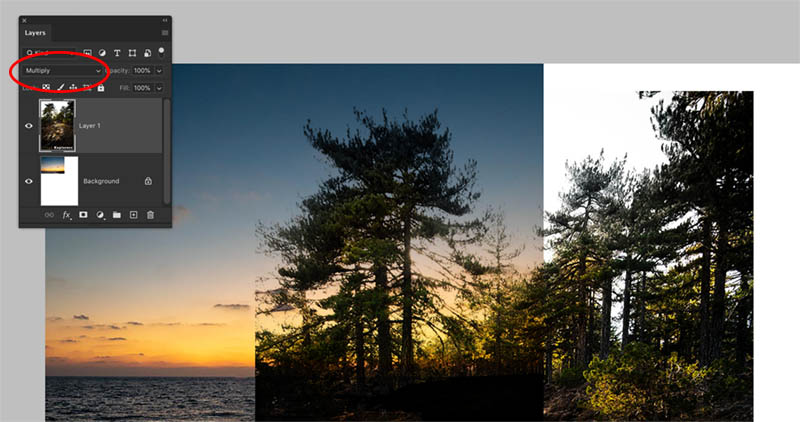
Use Multiply to get the top layer to show darker areas of lower layers
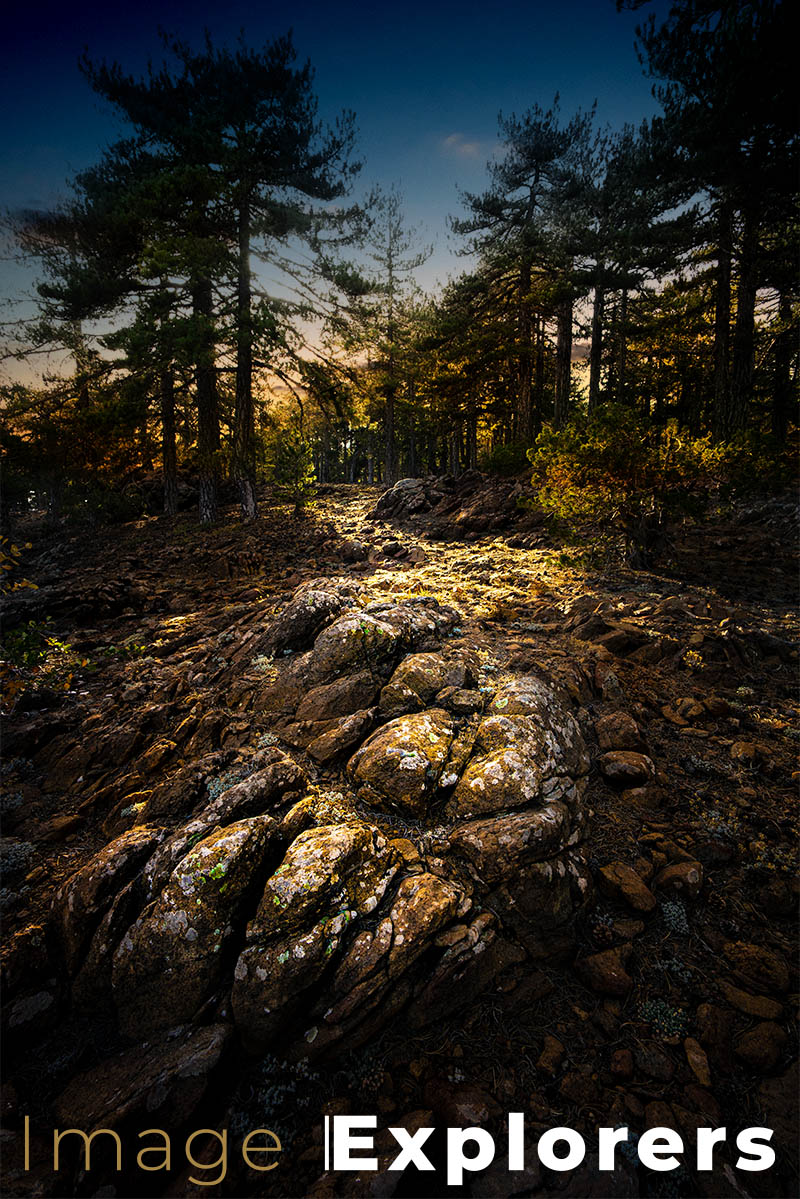
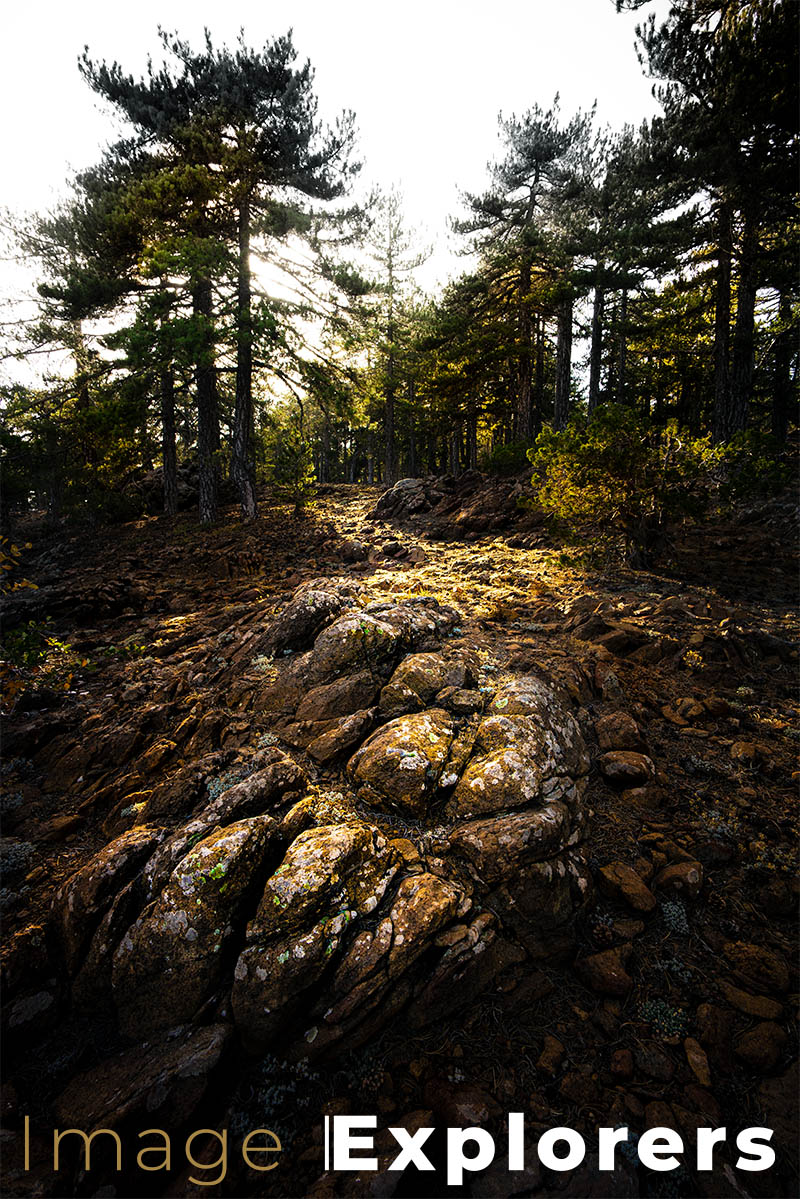
This technique is a bit more freeform. I edited the landscape in Raw image so that the sky went white and the trees were almost black. Whilst in the Camera Raw converter I also used the adjustment brushes to intensify the blacks in certain areas.
This image was then placed on top of the sky image and the top layer mode was set to multiply.
The image itself looked exactly how I had pre-visualised it when photographing it. This photograph was shot at the top of Mount Olympus in Cyprus…Yes you read that correctly. There is a Mount Olympus in Cyprus as well as in Greece. Who Knew?
Go out and create awesome silhouettes
So there we have a good range of silhouettes to try out. There are so many techniques for silhouette photography and so many times it can lift an image from good to awesome.
Don’t think of a silhouette as just a black shape in front of a brighter scene. They can be so much more than that. Start looking at other photographers work and you will see subtle silhouettes in so many images.
Consider adding a silhouette to your next image. You won’t regret it.
No Comments