

05 Apr Why Your Camera Lies to You – Exposure Compensation
Why Your Camera Lies to You – Exposure Compensation
The light meter in your camera is a very useful tool, but there are times when you need to know that it’s actually lying to you. So how you can overcome it? Exposure compensation to the rescue.
Firstly, let’s look at what the camera light meter sees. The light meter shows a scene as being correct when it averages to perfect grey. Great for most images but it means that if you’re trying to photograph a white polar bear in snow your camera will give you the perfect exposure reading to make the snow and bear a mid-grey. This is a perfect time for exposure compensation. By adding 1, 2 or even 3 stops of light we can make the grey go white and compensate for the camera’s incorrect exposure. Exactly the opposite for a black cat sitting on a black mat. We need to give the camera less light than it thinks it needs so that the cat will look black and not come out grey.
“But I don’t photograph polar bears and my cat is already grey”, I hear you cry!
Okay, so how about a sunset or sunrise? All that sun shining directly into the lens as well as a dark foreground, can fool the camera into giving you an exposure that results in an image which doesn’t look like you envisaged it.

Without exposure compensation (the camera’s ‘correct’ exposure), on this image of shipwreck in Cyprus, the sky looks too light
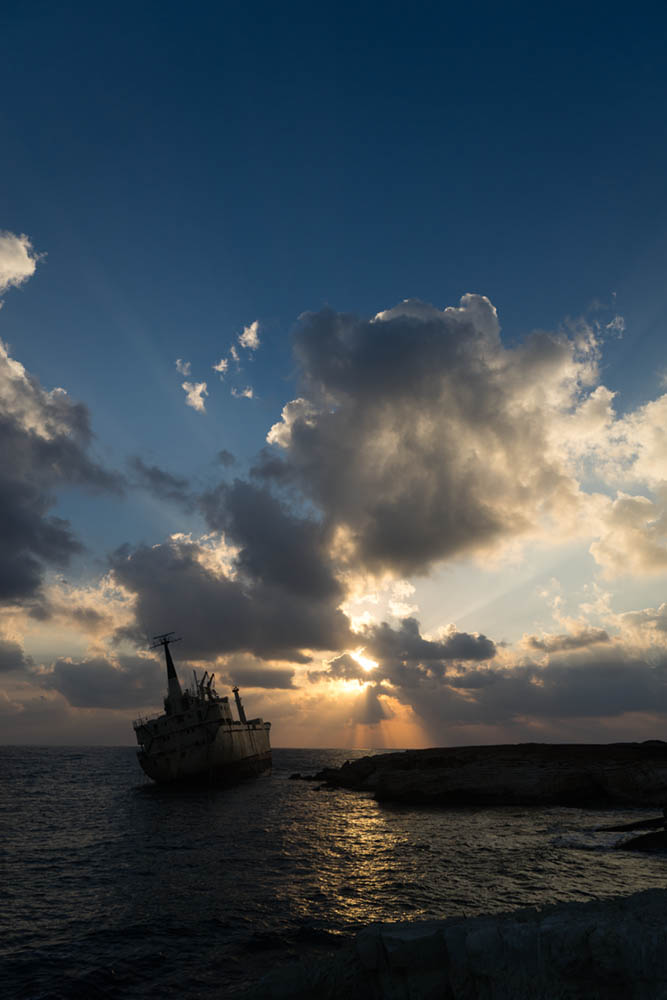
By using exposure compensation on the shipwreck in Cyprus we can make the sky more pleasing, but everything else is too dark, but we then use dodge and burn techniques to correct this. See image at end of post.
How about the photograph of your loved one standing on a beach in the shade of a palm tree? The camera looks at the scene and makes its exposure decision based on the sunny background so the small person in shade in the front is too dark but the bright sunny background is perfectly exposed.
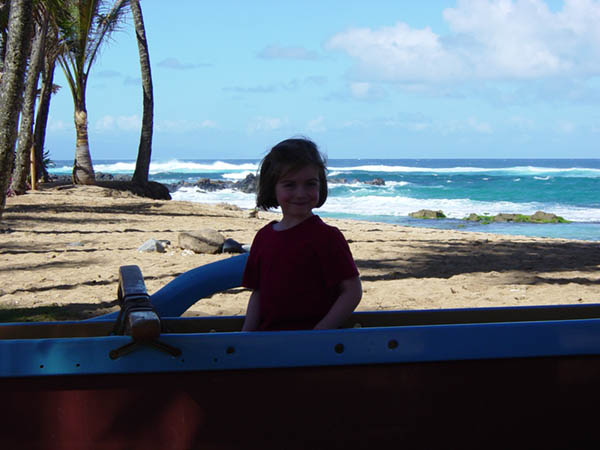
Correct exposure doesn’t always mean a pleasing image
So how do we fix this?
Well, if you’re photographing in manual mode, you can just adjust your shutter, aperture or ISO a few stops to compensate for this. If you are photographing in an auto mode like aperture or shutter priority, or even program mode, then most cameras have an exposure compensation button. This allows you to over or underexpose a scene to compensate for the camera’s light meter.
So far so good but sometimes you want the perfect exposure for the bright sunset so the sky looks beautiful. Not only that but you also want the dark foreground to look bright and vibrant too.
Well there are various ways you can have your cake and eat it.
Option 1 – Bracketing
This means taking 2 or 3 (or more) images of exactly the same shot with different exposures. Most cameras have a bracketing function built in, where it will take a number of shots, a number of stops over and under your original choice of exposure.
So what next? You open Photoshop and this is where the magic happens! Photoshop will allow you to merge these multiple images into an HDR file so you can have details in the dark as well as light areas.

Using 2 images of different exposures (circled in red) to create a third HDR image
Although one can do this in Photoshop, (you get there by selecting multiple images in Bridge and choosing Merge to HDR from the tools and Photoshop sub-menu), I would recommend using a different piece of software. Aurora HDR 2018 seems to give much more pleasing results than Photoshop.
Option 2 – Dodge and Burn
Use an image that shows the most detail in both areas. Lighten the darker areas with either a dodge tool in Photoshop or an adjustment brush in Raw (much better quality). Now darken the light areas with a burn brush in Photoshop or an adjustment brush in Raw. See our before and after tutorial of Queen Carolines Temple in Hyde park.

Similar image from shipwreck set – with a bit of dodging and burning in Photoshop Raw to bring the ship and rock details to life
Option 3 – Shadows/Highlights
In Photoshop there is an adjustment setting in the adjustment menu called the Shadows/Highlights. This amazing adjustment allows you to lighten the darker areas and darken the light areas of an image. (You can achieve a similar result in Raw with the Shadow and Highlights sliders. You will also need to up the Saturation and Contrast a bit.)
Correct exposure doesn’t always mean a pleasing image – image copyright Adobe
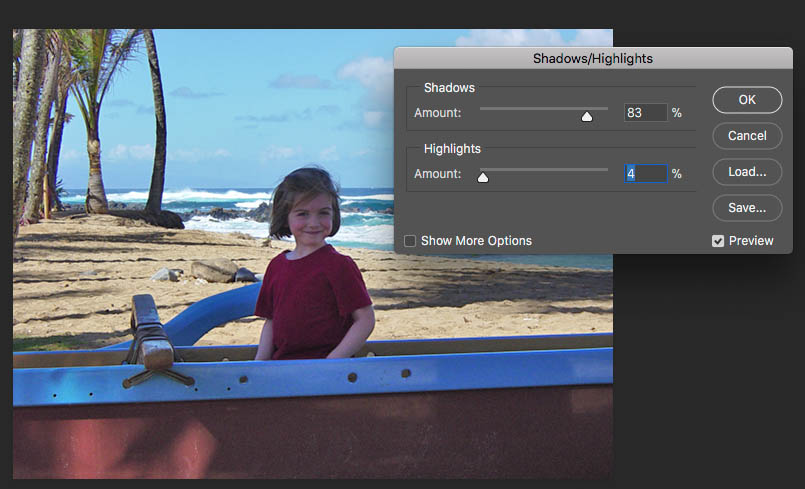
Using the Shadows/Highlights tool as a form of Exposure Compensation
Finally, if your images show too much detail in the shadows and highlights area there are numerous ways of increasing contrast to get more “punch” but a quick trick is to use the Dehaze tool in Photoshop Raw. See a video tutorial here and our favourite Photoshop shortcuts here.
No Comments