

24 May The Elusive Dramatic Sky and How to Retrieve Using Camera Raw
Where’s my dramatic sky gone?
Very often you may photograph a dramatic sky but when the image is straight out of camera, you look at it and think, I know the sky looked way more interesting that that!
Example!
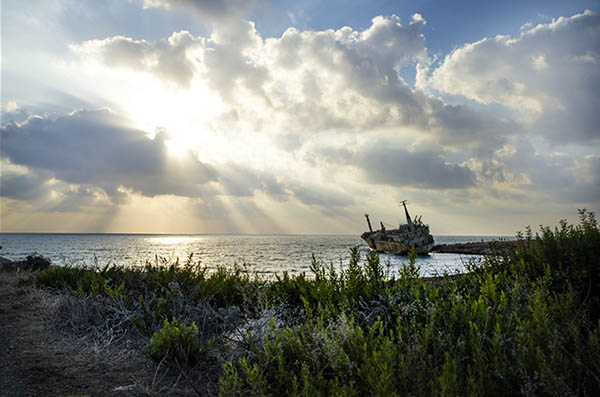
Dramatic Sky not as dramatic as it should be
Camera Raw to the Rescue
This can, thankfully, be rectified very easily in Adobe Camera Raw. There are a couple of ways of doing this. Today I’m going to concentrate on one using the Gradient tool.
As you saw above the dramatic sky isn’t as dramatic as it should be. So we open up the image in Raw. We choose the Gradient tool (hit G or click the fourth icon from the right from the options along the top), then click and drag down.
We then adjust the settings on the right hand side. The main ones to play with are:
- the Exposure – this will darken it down when you pull the slider to the left.
- the Clarity – this is ‘micro-contrast’ which helps bring out details when pushed to the right (or softens details when pulled to the left.
- the Dehaze tool – this does what it says on the tin and will reduce haze when you push the slider to the right (or bring more haze back in when you pull the slider to the left) upping the contrast and the saturation accordingly.
- the Highlights – where there is a lot of blown outness (new word I just invented) – ie, where there is a lot of sun blowing out the highlights, then pulling the Highlights slider to the left can help bring these back. Be careful not to overdo it as it can go grey.
- the Shadows – this will lighten up the shadows where they may be too dark (pull to the right).
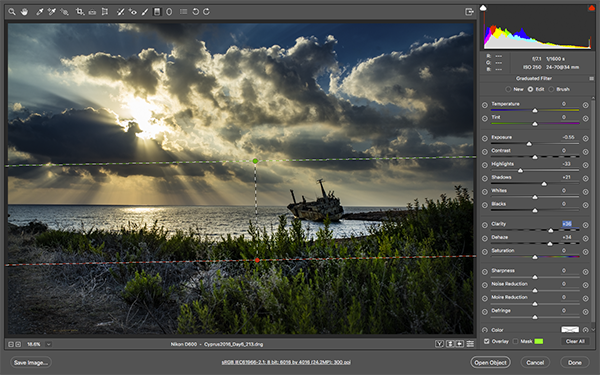
Showing the gradient tool bringing in the details of the dramatic sky
Don’t forget, even if you take a picture on your camera phone or other device, you can still get to the Raw settings by opening it up in Photoshop and going to Filter > Camera Raw Filter.
So, is this cheating?
Absolutely not. As we’ve talked about in a number of other posts, a camera gives an average exposure, (usually weighted towards the centre). This will darken down the whole image dramatically so when you lighten up your exposure in your camera to see the detail in the foreground, this is usually at the expense of a dramatic sky. All we’re doing here is bringing the image back to how you saw it originally. See this before and after tutorial of how we used Camera Raw


Drag the centre line to see the difference
No Comments