09 Jul How to load film into a camera – 35mm film photography
How to load film into a camera
So you have bought your first ever film camera and want to get a new box of film ready to pop in so you can join the world of analogue photography. Let us show you how to load film into a camera. This guide is for traditional 35mm SLR (single lens reflex) cameras rather than the rangefinder (Leica) style body. If you’re not sure what camera to get, see our guide here.
So what film should I buy?
Photographic film comes in 3 main types. Colour negative, colour transparency (known as “tranny”) and finally black and white. The films also have various sensitivities to light. These are measured in ISO. The higher the number, the more sensitive the photographic film is to light but the more grainy the image will appear. Most black and white film starts from around ISO 50. This is known as a ‘slow’ or a ‘low grain’ film. At the other extreme there are ISO 3200 films. These are very light sensitive but have a very pronounced graininess in the image. These are called ‘fast’ or ‘high grain’ films. Most people tend to choose a ‘normal’ film of around 125 or 400 ISO.
35mm film brands
So what film brand? Well there are quite a few brands available and each has there own subtle characteristic but I would suggest starting with one of the main ones. Kodak Tri-X or T Max, Ilford FP4, Ilford HP5, Ilford Delta or even Fuji Neopan. Any of those will be an excellent start.
How to load film into a 35mm camera
Open the film from its iconic little black plastic container.
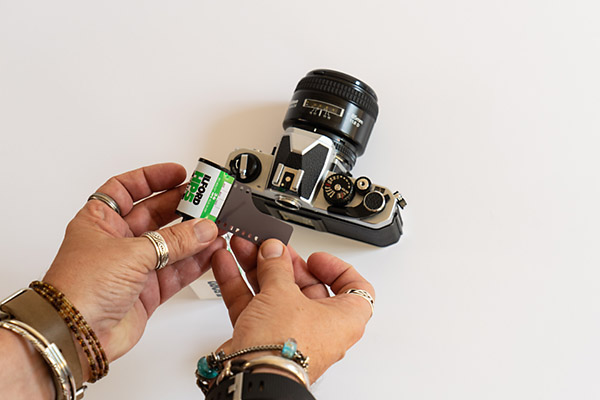
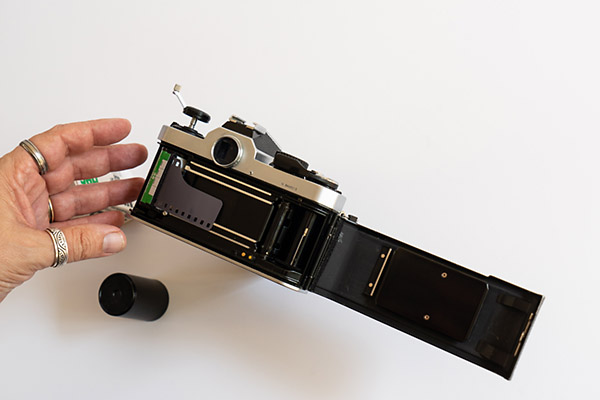
Pull the film just a little – about a couple of inches. Now open the back of the camera by pulling up the winder (rewind knob) – normally on the left hand side of the camera. It will give you a satisfying click and the back will pop open.
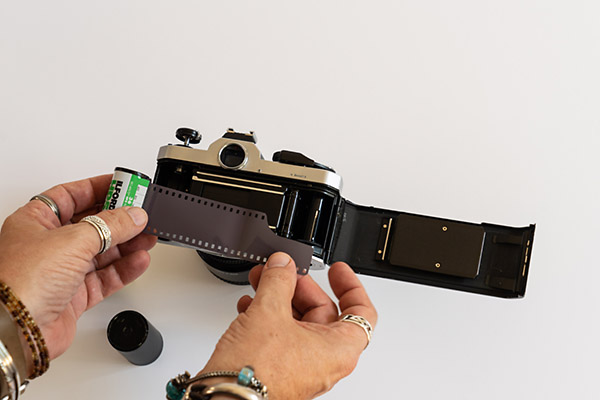
Now look at the sprocket on the right hand side inside your camera. You will see that there’s a slit in it. Place the cut-off end of the film, into the slit.
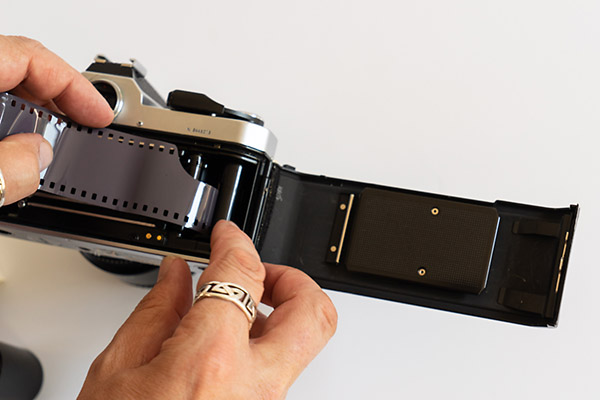
Then with your thumb, wind the bottom of that sprocket to the left, or using the film advance lever, just a little to ensure that the film has ‘caught’.
Place the film canister into the slot on the left hand side – you may need to pull it a little more to the left for it to reach.
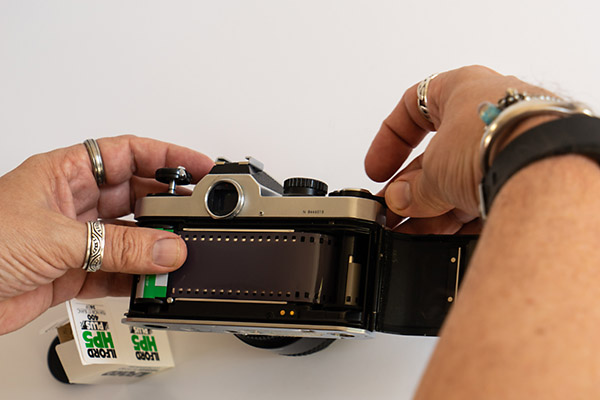
Close the back of the camera – ensure it ‘clicks’ shut and ensure the winder is down. It’s a good idea to very gently wind the winder clockwise a little, to take up any slack of the film.
Then make sure that the winder is pushed back down in its place.
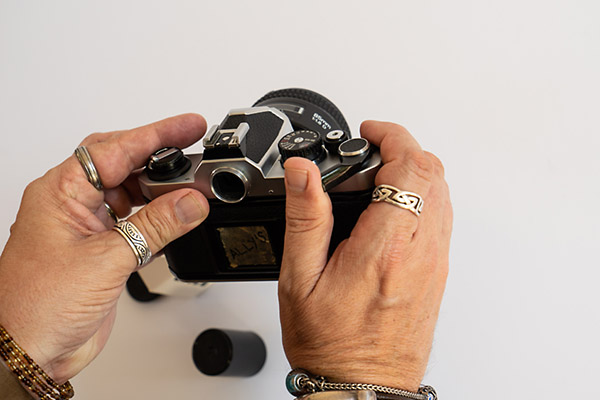
Now you need to move the film on a few shots to ensure that any exposed film is out of the way. Do this by pushing the shutter and winding on with the winder until the counter shows ‘0’. This will usually be about 3-4 clicks.
So now you know how to load film into a camera, get out there and create some awesome images! And remember … you can’t check the back to see how your image looks! If you’re not sure what makes a great black and white image, read more here.
How to unload film from a 35mm camera
When your film finishes, it will tell you as you won’t be able to wind it on anymore. Depending on how you loaded, occasionally you could get thrifty and manage to get an extra image out of your 35mm film.
To unload your film from a 35mm camera, turn it upside down and push the small button on the bottom right in.
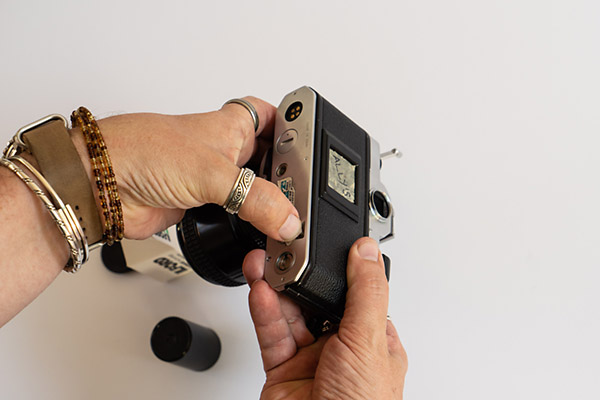
Now wind the rewind knob clockwise until you feel the film release. You can now open the back and remove the film. You can wind the film all the way back in if you wish. BUT, if you do decide to leave a small tail, it’s best to fold it over, so you know it’s been exposed. Leaving a tail can help you or the people who process your film.
If you do shoot any film, do let us know. If you stick with digital, check out our post on converting colour to black and white.


No Comments