

18 Jun Create a Digital Cyanotype photo without too much mess
Make a digital Cyanotype photo easily
Have you ever seen beautiful old photographs with a blue tone and wondered how you could create the same? A romantic cyanotype photo can look so stunning yet is so easy to do digitally. Let me take you through the process and have you creating an amazing cyanotype photo in minutes. It’s a bit messy but oh so worth it.
Traditionally, a cyanotype photo print is usually created using ferric ammonium citrate and potassium ferricyanide chemicals. The original process was invented by an astronomer, Sir John Herschel, around 1839. Of course, this was and still is a very messy process requiring coating paper with chemicals. This paper is then allowed to dry and then contact-printed (using your negative) onto the paper using a UV lamp or sunlight. It is washed and then dried. Lots of trial and error and not to mention cost. I want to show you how to get the same result digitally. It would be a shame however not to get your hands a little dirty so the first part of the cyanotype photo in digital will still require a bit of mess.
Some totally useless geeky info
Copies of architectural plans were named ‘blueprints’ because they originally used the Cyanotype process resulting in blue prints – now you too can impress your friends…
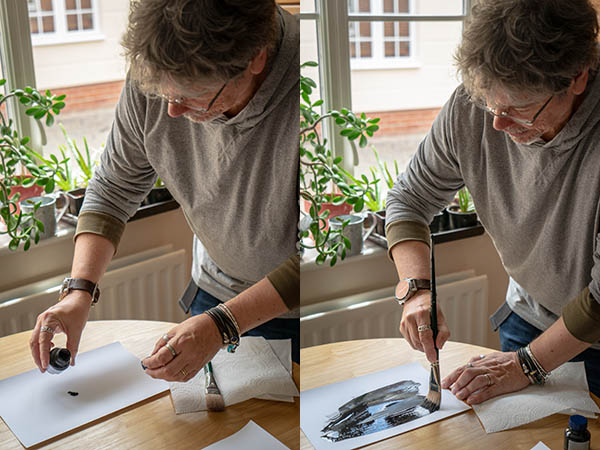
The preparation process or, as I like to call it, “Woo-hoo – I’m 5 again”
Ink, heavy duty paper and a brush is all you really need. I poured some ink onto the paper and painted it, making sure not to be too neat with the edges. When it had dried, I scanned the painted page in at a high resolution. I use 600 ppi at A4 as this translates into 300 ppi at A3 size. You can always photograph the paper if you don’t have a scanner. (Just make sure the camera is parallel to the inked paper.)
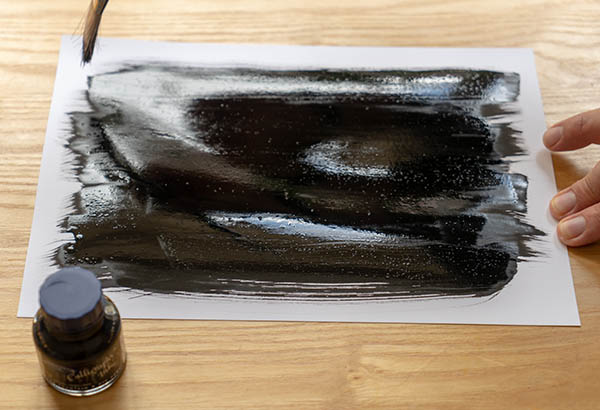
Cyanotype photo process – preparing the paper
Let’s get toning
While traditionally a cyanotype is Prussian blue and white, you can also achieve a slight yellow in the highlights by bleaching and toning. This split tone look is the one I am going for here.
Open your chosen image in either Adobe Photoshop Raw, Lightroom or Affinity Photo. I will be demonstrating in Photoshop Raw.
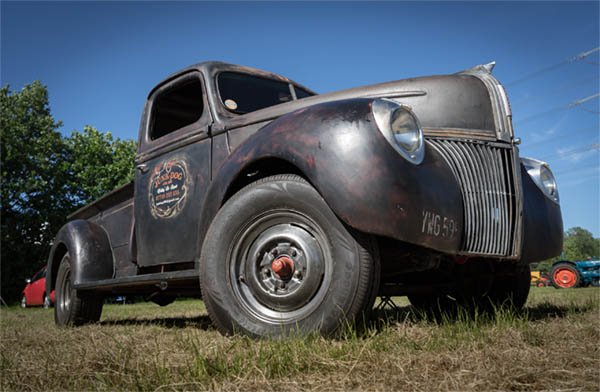
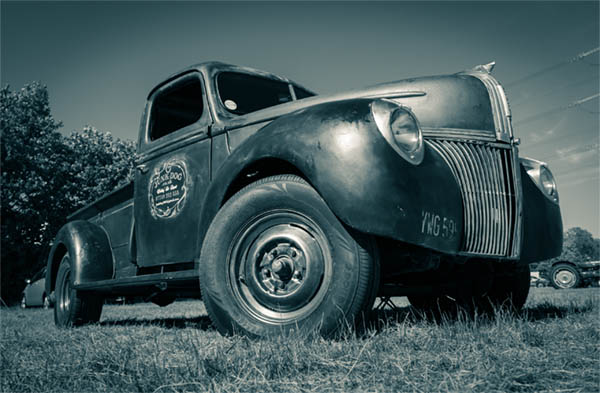
Original Image
After you have got your settings for lightness, darkness and shadow detail correct, you will need to click on the black and white photo button. Of course you can then still lighten and darken certain areas with the Black and White control sliders.
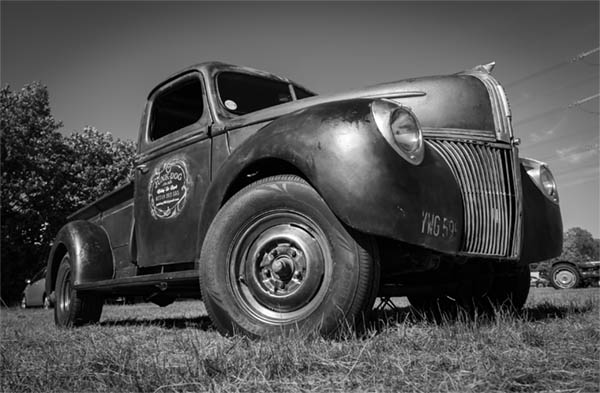
Converted to Black and White
Next step is to choose the toning tab. I added a small amount of yellow in the highlights, and more blue in the shadows.
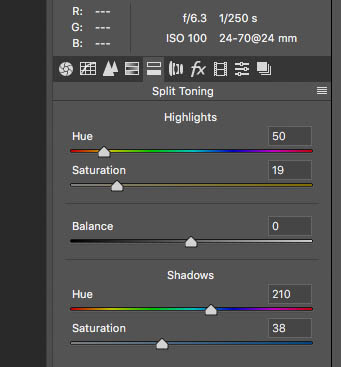
Split tone sliders in raw for cyanotype colour
With Cyanotype photo colour tone
Creating the digital painted frame look
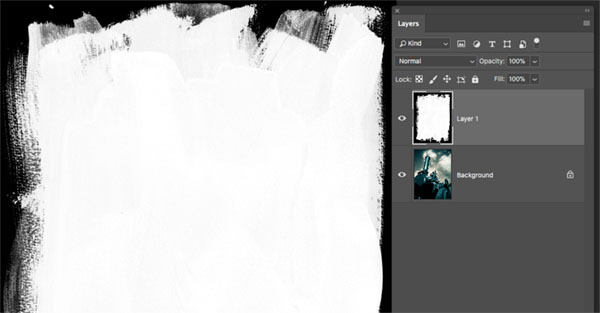
Open up the scanned image in Adobe Photoshop or Affinity Photo. Bring in your toned image. Drag or copy/paste the scanned inked paper onto the toned image.
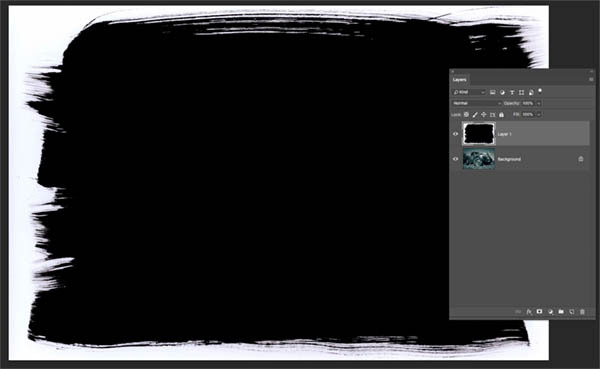
Paste Painted paper scan onto cyanotype photo
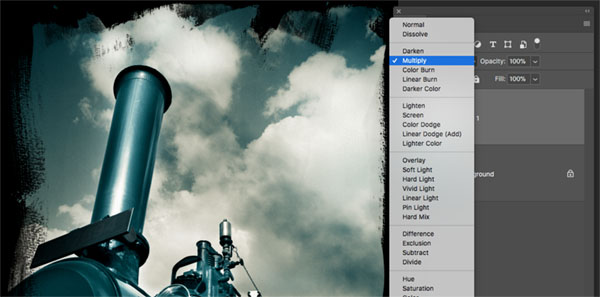
Now for the magic … set the paper layer mode to Screen. Ta-da. A beautiful cyanotype photo with a hand painted paper edge replicating hand-made sensitised paper.
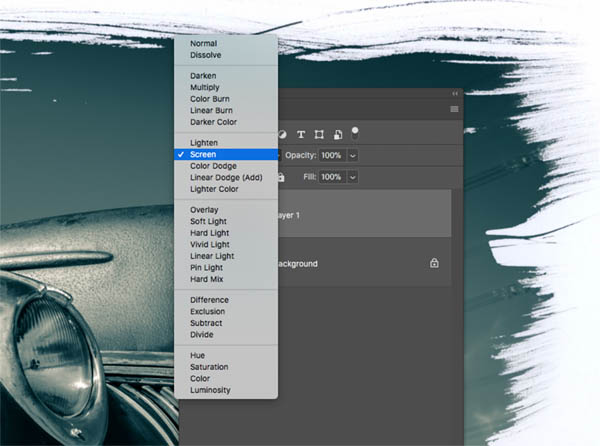
Set layer to screen for Cyanotype photo emulsion look
Useful Geeky Info about Modes
Simply put, the Screen mode hides the black on the layer. It is the opposite of Multiply which hides the whites.
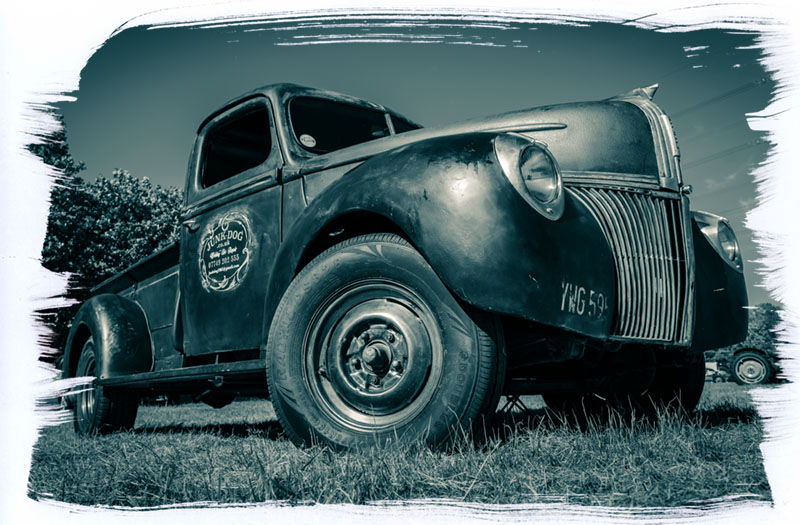
Cyanotype photo with emulsion paint effect
A Reversed Background
The reversed background is nothing like a Cyanotype photo but still quite cool. If you wished to have the image look like it was painted onto a black background you could invert the paper layer and then set the paper layer mode to Multiply.
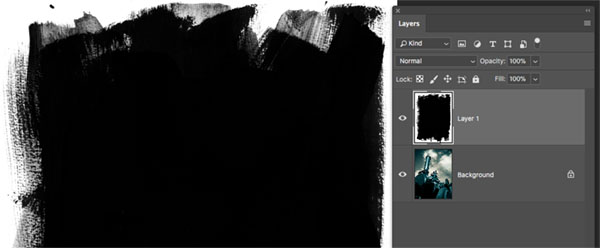
Original paper layer as used in cyanotype print
Paper layer as used in cyanotype print inverted
Convert mode to multiply for cyanotype on black paper
Variations on the theme
This Cyanotype photo technique has so many variations when it is done digitally. Why not try painting on various surfaces to get interesting textures on you photographs. Create other interesting split tones or even use it on full colour images. As always remember. A Black and White toned image will not rescue a boring photograph but a good photograph can be made even better with sympathetic tones. Mostly, have fun.
No Comments