

03 Sep How to photograph a panorama – a tutorial
How to photograph a panorama
Have you ever seen a scene that is so expansive and beautiful and thought to yourself something like “A single image with my wide angle lens just can’t do this beautiful vista justice”? On the other hand, maybe when you’re out creating images, you just don’t have a lens that is wide enough. Whatever the problem we would like to show you how to photograph a panorama and get pro results.

Our scene
We were is Sharm El Sheikh in Egypt and had spent the afternoon on camels, riding to an area of the Sinai desert. As this trip was to go stargazing through the large telescopes they set up in the desert and we were on camels (not the most comfortable experience!), we were travelling very light.
Just before sunset we got to the amazing scene you can see in our Panoramic images. Obviously it was too wide for our widest lenses we were carrying but this was where the multi image stitched panorama came into play.
How it was done – The Photography
The video we took – the vista was incredible however far too wide and also very “flat” contrast-wise.
We photographed the scene using the standard focal length on our cameras so as not to get any distortion on the images. The standard focal length is about 45mm to 55mm on a full frame camera and 28mm to 34mm on an APS-C camera. (This is known as standard focal length as it gives the similar field of view as the human eye).
When you photograph a panorama, ideally you should have your camera on a tripod so that when you take each image the horizon stays in the same place. We didn’t have that luxury so we just did the best we could by putting the horizon at about the top third of the image. When you photograph a panorama scene make sure you overlap each image or you will end up with gaps in your final image. It’s really easy to miss a bit out so do be careful at the photography stage. We always do 2 or 3 sets just in case.
As you can see from the un-retouched raw images below we underexposed the images to get a bit of sky detail. We always prefer this method as it’s easier to lighten dark shadow areas than it is to get back blown-out highlights in Raw. We expose digital like we used to expose transparency film. For more ideas on how to make the sky dark in a photo, see our post. You can also use filters to help darken down the sky.
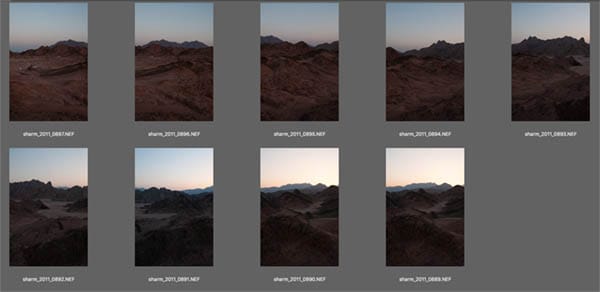
Un-retouched Raw images
How it was done – Preparing the original images
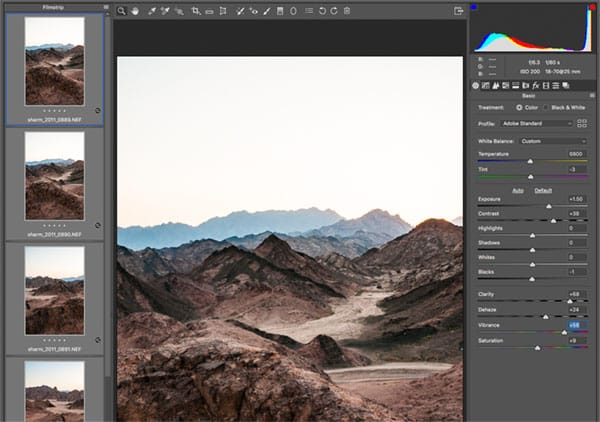
The next stage is to correct all your images in Raw. We do them all at once in the Raw file converter from Adobe bridge but you can do the same in Lightroom. The most important thing is consistency.
Images in Raw ready for processing for panorama
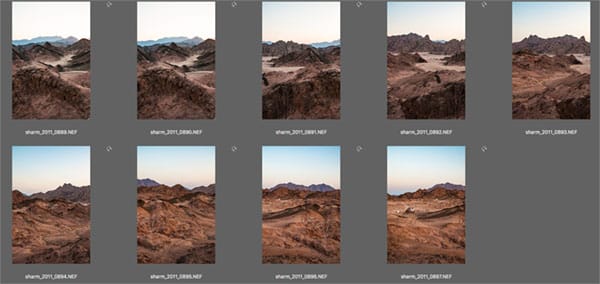
Contact sheet of images once processed in Raw
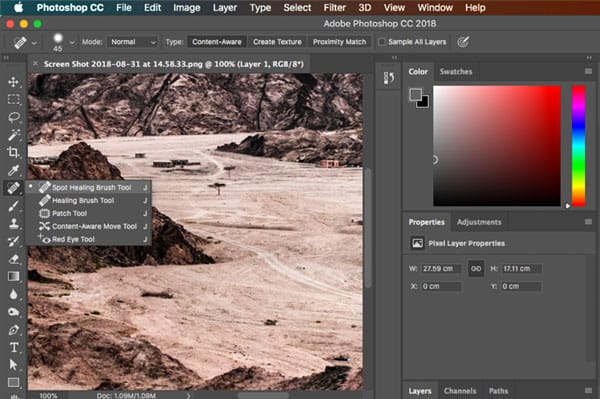
How it was done – Creating the Panorama
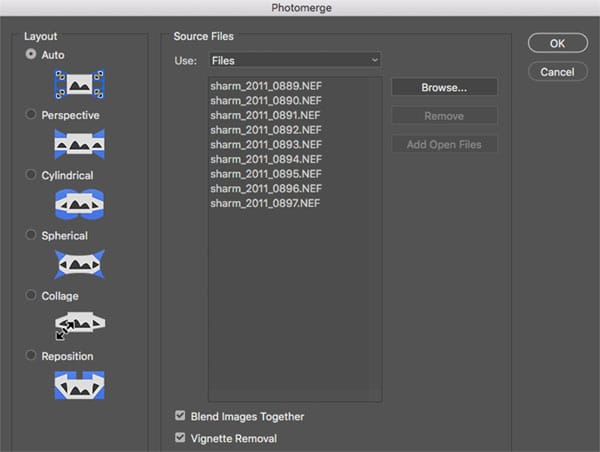
Using Adobe Bridge in Creative Cloud, we went to the tools menu and found Photoshop and chose Photomerge.
This can also be done from the File menu in Photoshop (any version) and choose automate and then Photomerge.
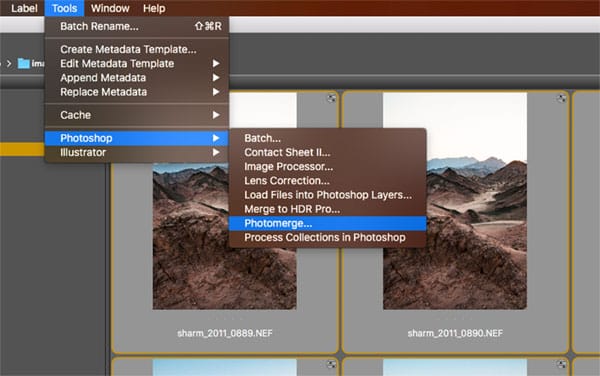
We used the Auto setting as it seems to give a good stitch result for most scenes.
The stitched Panorama photograph is made up of masked layers. Each original image is a separate layer. Once I have checked the image for any issues, I flatten it down by merging the layers.
Pro Tip: You can create your Panaroma as a raw file, so the original Raw images are editable within the pan. When you open the Raw files in Camera Raw, select them all and then choose Merge to Panorama in the drop down menu by the film strip.
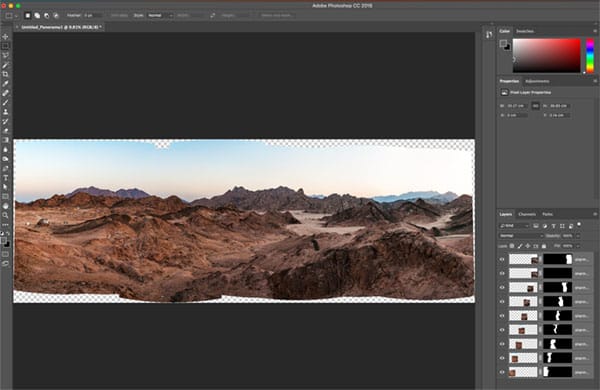
Initial stitched image in Photoshop
Next stage is to crop the image to size. We still do some more editing at this stage. In our scene there were some temporary dwellings created by the nomadic Bedouin people. We removed them from the scene as they are not permanent features of the landscape. We do the same with rubbish as it’s not part of the scene and might not be there on a different visit a few weeks later. Removing permanent structures is changing the scene totally and requires a totally different conversation for another time, about how far your own manipulation can go.
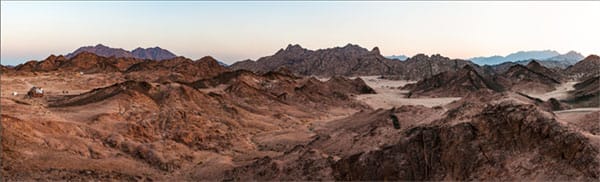
This is the un-retouched final Panorama
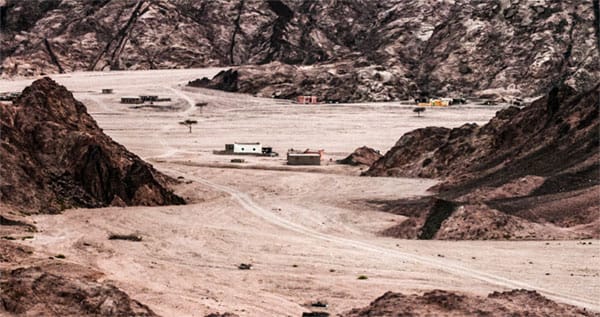
Here are the temporary structures that we removed
We used the Spot Healing tool to very quickly remove the unwanted details.
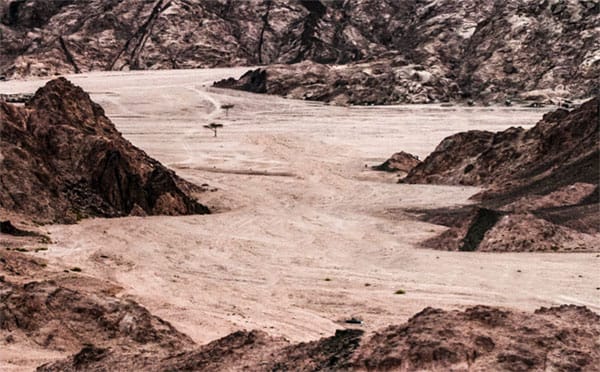
Initial images after removing temporary dwellings
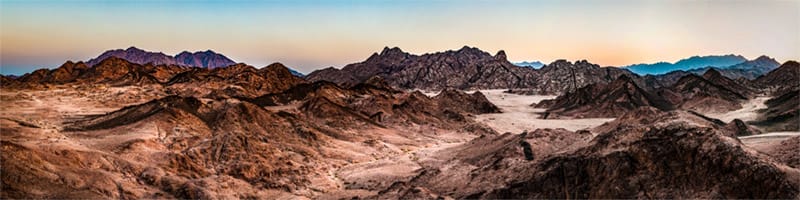
The final resulting Panorama
An alternative version of the same scene
There are some great textures in this scene which could also be incorporated into other images.
To sum up the workflow:
- Photograph with a standard lens or lens setting on your zoom
- Overlap the images
- Watch your horizon line
- Let Adobe Photoshop do all the hard work for you. (See our favourite shortcuts)
- Print it large and wait for the flood of compliments!
So there you have it. Never worry about not having a wide enough lens ever again.
No Comments