

09 Oct How toast can help you to create awesome B&W images with Dodge and Burn tools
How toast can teach you how to create Awesome B&W images with the Dodge and Burn tools
“TOAST! Tim and Ally…. Really?” “Erm yes…It really does help with Dodge and Burn tools. We’ll get to that later but first things first.”
Dodge and burn tools have become a bit old hat to many photographers. With so many quick and easy digital ‘fixes’ it’s easy to see why, but these tools, although going back to traditional printing times, are some of the best ways to make your black and white images (and colour too) look amazing. We can safely say that there is not an image on our blog that doesn’t use at least one of these in some way or other. See our tips and geeky explanations for what makes a good black and white image.
Dodge and burn in traditional printing
In traditional printing, you have an enlarger which projects your negative onto paper. The more light you expose the paper to through the negative, the darker the print will be. After you’ve done a test strip, which helps you work out the required exposure, you would then expose the light from the enlarger onto your paper. Depending on the exposure, there can often be areas of the image that would be too dark or too light. You would then do another test strip over those areas to work out that exposure time. Dabbling or jumping into film photography – see our post on the best film for travel photography and filters for black and white photography.
Dodging
When it comes to the final exposure of the print, you would expose for the final image with adjustments, but for the area that was too dark and needed less time, you would use a piece of card, normally attached to a piece of wire to wave madly over that area to prevent light getting to it – well maybe not madly, but moving enough to prevent a hard edge being projected onto the paper. This lightening technique is called dodging.
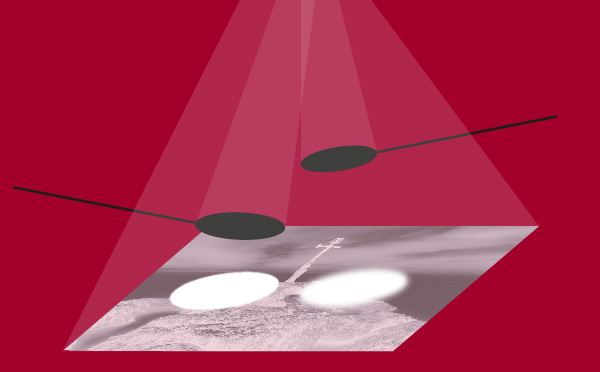
Dodging the print with cardboard ellipses on sticks
The further away from the paper you manipulate the light, the softer the dodged or burnt area edges will be.
Burning
For the area that needs more light, you would expose the image with the normal exposure, then you would give the area the needs more light, the extra light that it needs. How do you do that? Well, depending on the size and shape of the area, you can use your hands cupped together to block out the light and only allow certain areas to get extra light, or you could also use a piece of card with a hole cut in it to give that area more light … directing (or burning) the light. Again you wave it gently between the enlarger and the paper (to prevent getting a hard edge).
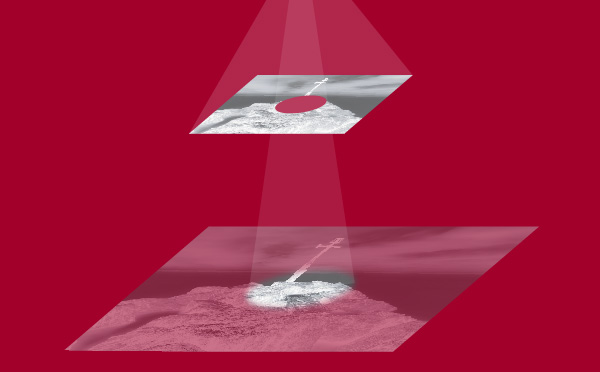
Burning in areas by giving them extra exposure through the cardboard hole
Pro tip:
Now one of the advanced traditional techniques used by traditional film printers is to dodge or burn with a different contrast. This is done by using multi-grade paper and changing the grade filter on the enlarger lens before dodging or burning. This technique allows you to have a combination of high and low contrast so for example in your scene you might need more contrast in the sky to get awesome looking clouds but the foreground needs sensitive shadow and highlight detail so a lower contrast.
Dodge and burn in Photoshop or Affinity photo
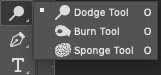
Now digitally, the darkroom effect can be applied in Photoshop. In your toolbar, normally down the left-hand side, you should see what at first glance looks like a lollipop. This is in fact a version of the round piece of card on a piece of wire or stick, used in dodging. Click and hold that and you’ll see 2 other icons and the text. We’re not going to look at the Sponge tool but the Burn tool has a hand with a hole made with the fingers and the thumb. This is depicting one of the options you can use when burning in!
When you choose any of these you will see your options along the top menu change to something like this.
![]()
This means that you can control how much dodging / burning you will do to your image with the exposure, and what tones you will affect, such as Highlight, Midtones or Shadows.
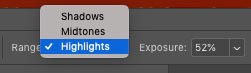
Most of the time you will need midtones, but if the area you wish to adjust is in the highlights or shadows, you then choose the appropriate Range from here. Choose a brush size and click and drag around the area you wish to lighten / darken. Be careful not to overdo it and use a brush bigger than you think. Undo is your friend here!
So where on earth does toast come in?
Well a lot of people get confused with which one darkens and which lightens.
The easiest way to remember this is:
If you burn the toast it will go darker – hence Burn darkens – easy to remember now.
Dodge and Burn in Raw (adjustment brushes)
There are a number of reasons to dodge and burn using adjustment brushes in the Raw file converter but the 2 main ones ore these.
- This is a non-destructive technique so you can always come back and re -edit the image at a later stage.
- You can use the dodge and burn with contrast adjustments like the advanced traditional film technique mentioned above.
In Adobe Photoshop (CS6 or CC) Open your Raw image in the Raw file converter and navigate to the adjustment brushes. It’s along the top.
![]()
Paint the area you wish to dodge and burn and then adjust the settings on the right hand side. We usually use the clarity slider to add contrast when needed and the contrast slider to reduce contrast.
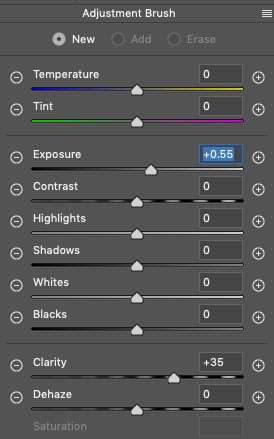
Do a new adjustment for each area you wish to work on. (Not sure about Photoshop or Affinity – see our post which gives the lowdown on them). See also our Top Photoshop shortcuts.
Putting it into practice
We photographed the tower on the City wall in Dubrovnik, Croatia, but the original looks so uninspiring that a bit of Dodging and Burning was required.
- The sky was quite tricky as while the whole area needed darkening, some parts needed less contrast and some more. We did this with 2 large burning in areas with adjustment brushes. Both darkened with the Exposure slider but one added contrast with the Clarity slider while the other reduced contrast with the Contrast slider. See our post about dramatic skies.
- The sea was burned in and had added clarity
- The tower was dodged to lighten it but with added clarity to show detail in the texture.
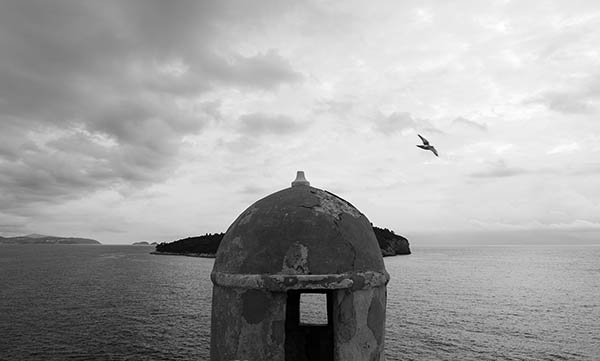
Original image
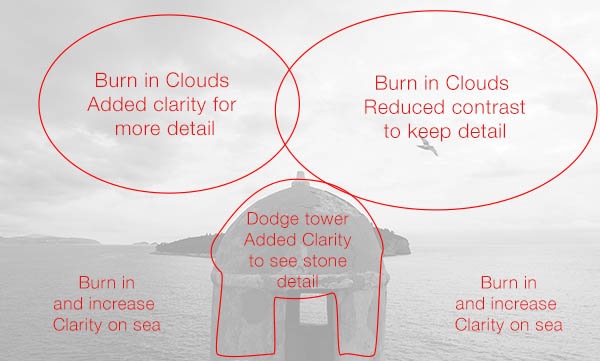
Areas we adjusted with the brush
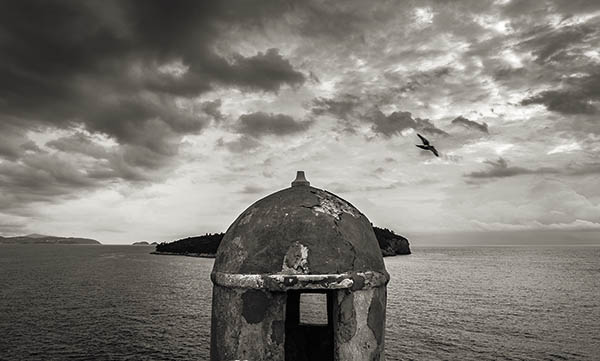
Final result
Revolutionise your new images and give new life to old ones
Dodging and burning has been used by film photographers since photography was invented and it’s still one of the best ways to get what you want from an image. Give your new images that exquisitely beautiful look you have admired in the masters printers work or add new life to old photographs.
Mostly, enjoy what you do.
If you are in the London / Essex / Suffolk area, we run training at your office / premises in Photoshop. Want to buy Photoshop – click the Adobe image at the bottom of this page from this link.
No Comments