

23 Jul How to photograph like Edward Weston
How to photograph like Edward Weston
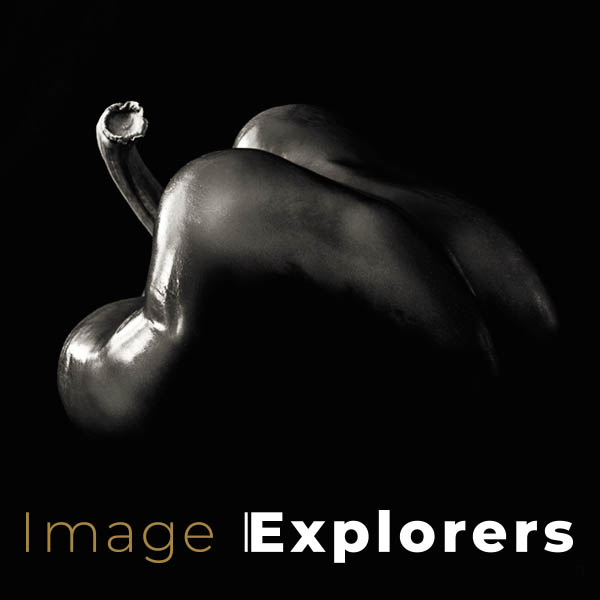
So you’re out travelling and all prepared to go out to photograph that amazing landscape you noticed on the drive to the hotel yesterday. Unfortunately, the weather has other ideas and it’s pouring with rain. What can you do? How about creating your own beautiful images from items you find around your apartment? In this post, I’d like to show you how to photograph like Edward Weston. Edward Weston was an American photographer born in 1886, and was regarded as one of the masters of 20th Century photography. He photographed primarily using an 8×10 large format camera, and was known primarily for his black and white “landscape like” still lives.
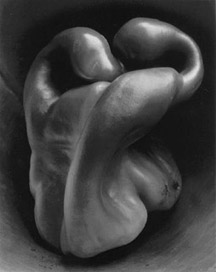
Edward Weston’s most famous red pepper – photograph from Wikipedia. Find out more about him here
Learn from the great masters
Have a look at our other ‘How to photograph like…’ series that includes Michael Kenna and Ansel Adams to see how to create images like they have.
Why remove the colour?
One of the important features of Edward Weston’s work was the beautiful shapes that he created. When we photograph the pepper in this tutorial, look at the original in colour. Yes, it’s very striking, the red on the black, but that’s all you notice – red and black. We really want to show the form and texture of the vegetable, so black and white does this beautifully.
The Setup
The photographic setup, is incredibly simple. I put the pepper onto one of my black t-shirts on the table. I set up the camera on a tripod and the whole scene was photographed next to a window. The only other lighting, apart from the window lighting, was from a large white reflector. You can use anything white to reflect light back into the image.
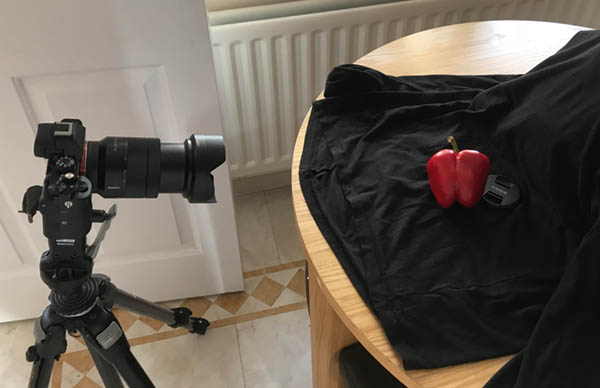
Camera set up for how to photograph like Edward Weston
The Photography
When trying to photograph like Edward Weston, the more gnarly and quirky the fruit or veg, the better. Unfortunately, my peppers from the local supermarket were neither, so I moved it into a position where it would at least look interesting. As it kept falling over, I propped it up with my lens cap.
Move your scene and your reflector around until you get some interesting highights on the subjects. I photographed with quite a small aperture, therefore the shutter speeds were quite long; so, a tripod was essential as I needed to ensure the camera was steady.
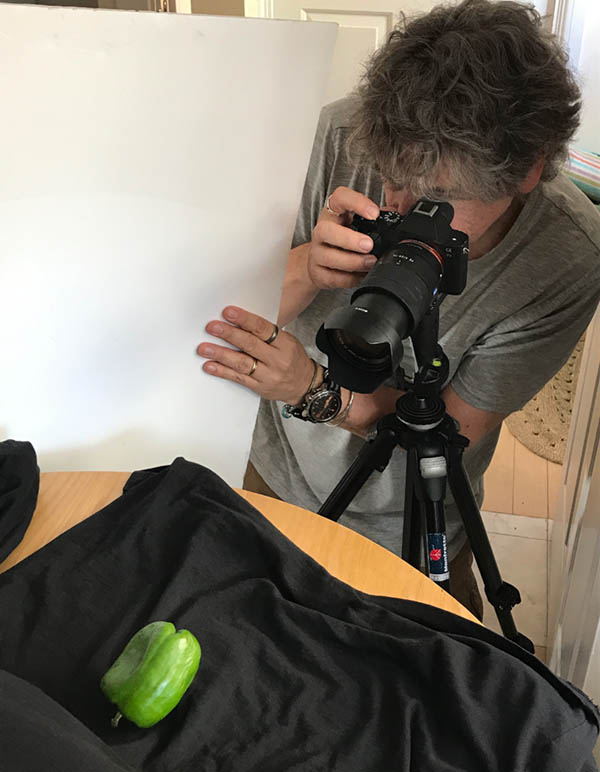
Tim tries a green pepper for how to photograph like Edward Weston
The Photoshop process
To get the final photograph like Edward Weston has done, we need a bit of post production.
I first opened the image in Camera Raw but you can do the same in Lightroom or Affinity Photo Raw
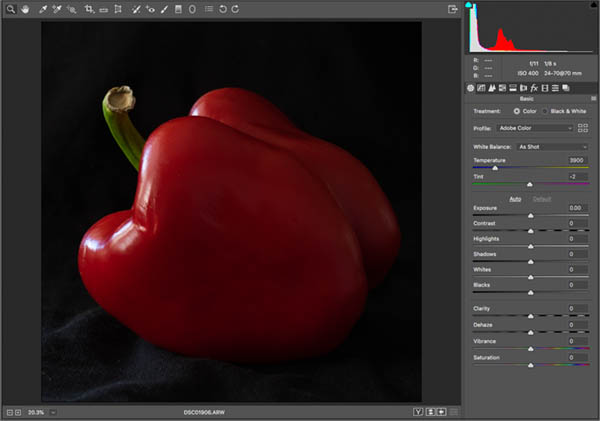
Original image opened in Adobe Camera Raw

Convert colour into black and white
There are many ways to convert colour to black and white and this is just one of them. See our article on converting colour to black and white with tips and techy-geeky explanations.
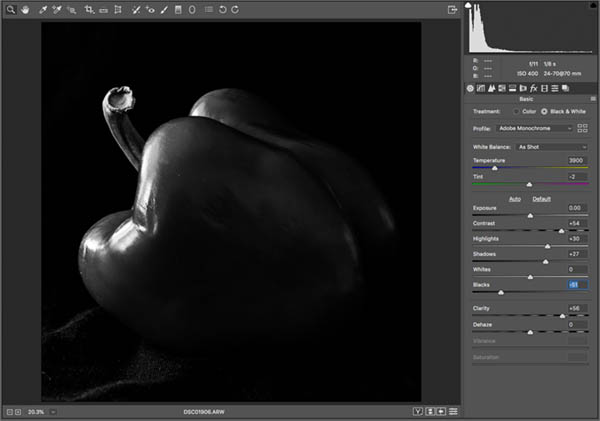
Darken shadows to get the Edward Weston contrast style
I darkened the black and increased the contrast and highlights so the feeling of my image was a photograph like Edward Weston although I went for a much darker overall look than he used to create.
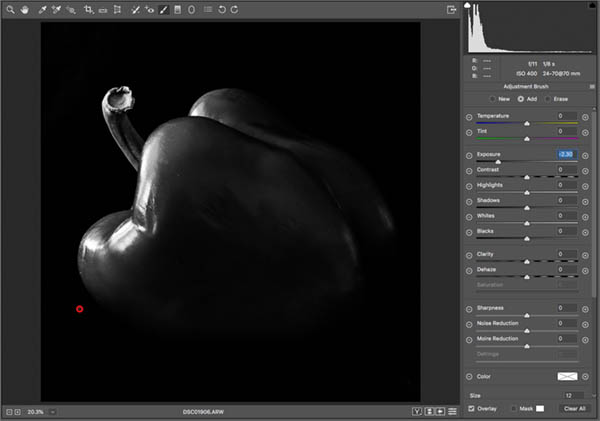
Darken large areas with the adjustment brushes using Exposure or Blacks

Lighten highlights for authentic Edward Weston contrast
Still in the adjustment brushes, click on the New radio button at the top to create a new brush and paint in the highlights. In the highlights increase Exposure, Contrast and possibly Clarity. If you go too far you can click the Erase radio button at the top to remove any over-painting. Click New again and do the same but on the shadows, darkening them down to taste.
We’re now going to take this into Photoshop, but before we do, click on the information underneath the photograph which will then allow you to use sRGB rather than Greyscale as the Colour Mode. This will give you the ability to put colour into your image in Photoshop when you start to add the toning. If you open the image as a Greyscale image in Photoshop, you would then have to convert to RGB colour before adding any colour back in.
Techy-Geeky stuff!: Whilst you are in this area, you could also choose the 16-bit channel option, over the 8-bit channel option. This will give you thousands of shades of grey per RGB channel, rather than the 256 shades you get from 8-bit.
The first stage of toning your image in Photoshop for that authentic Edward Weston like photograph
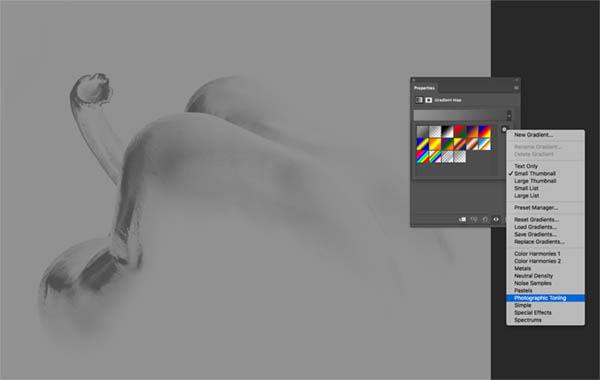
In Photoshop, go to your Layers panel, and click the black and white circular icon at the bottom to add an adjustment layer. The adjustment layer you need is called Gradient Map.
In the Gradient Map, click on the drop down next to the gradient. In here you will see your basic gradients. But then now click the little cog to the right. This opens up some more options and you need to choose the Photographic Toning option. This will give you a lot of gradients, that replicate traditional photographic print toning. I chose Selenium 2 to get a beautiful subtle selenium tone to my final image. (If you go back to the cog, you can choose to view the gradients options in different ways, and by choosing the Text Only option, you’ll see what the gradients are called).
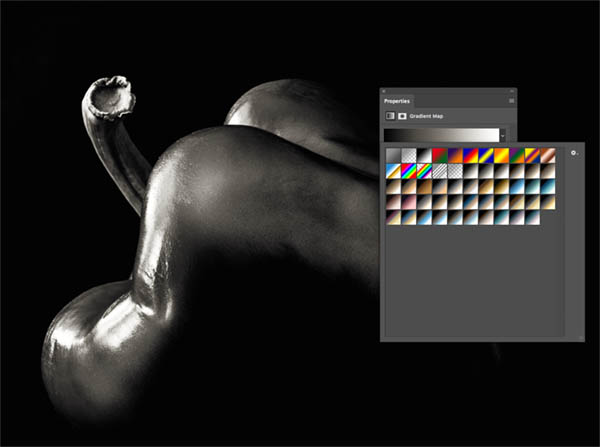
Experiment with various gradient map photographic tones
Using the master photographers as a base inspiration, you can go on to create all kinds of photographic styles. You can then experiment and tweak them to make them your own. This particular how-to-photograph like Edward Weston technique, works beautifully on vegetables and still lives. However, it’s also a really interesting technique on faces and real-world landscapes.
Most importantly, enjoy every part of the process!
See our convert colour to black and white in 30 seconds video.
No Comments